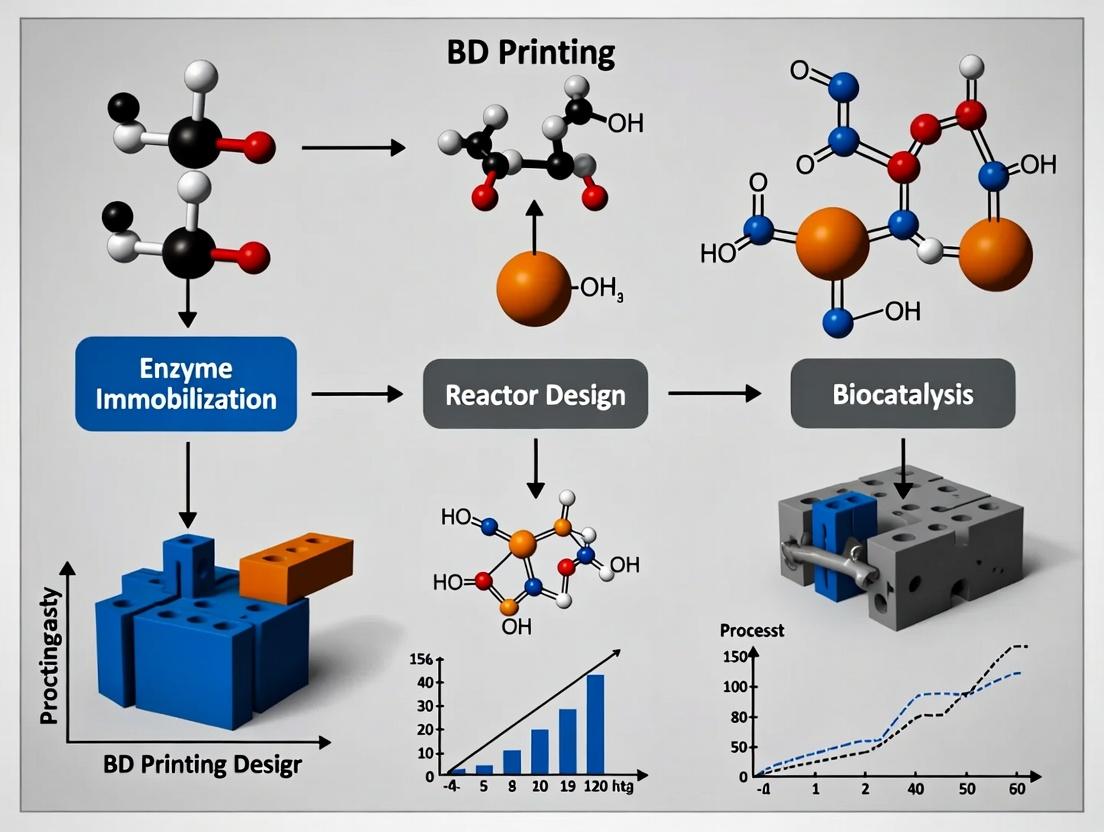
Revolutionizing Biocatalysis: Advanced 3D Printing Techniques for Next-Generation Immobilized Enzyme Reactors
This article provides a comprehensive overview of 3D printing as a transformative tool for designing and fabricating immobilized enzyme reactors (IMERs).
Revolutionizing Biocatalysis: Advanced 3D Printing Techniques for Next-Generation Immobilized Enzyme Reactors
Abstract
This article provides a comprehensive overview of 3D printing as a transformative tool for designing and fabricating immobilized enzyme reactors (IMERs). Tailored for researchers, scientists, and drug development professionals, it explores the fundamental principles and materials enabling this synergy, details cutting-edge methodological approaches and their applications in biocatalysis and biosensing, addresses critical challenges in resolution, biocompatibility, and enzyme activity retention, and validates performance through comparative analysis with traditional fabrication methods. The synthesis of these insights highlights 3D printing's pivotal role in creating customizable, efficient, and scalable IMERs for biomedical research and industrial processes.
The 3D Printing Revolution in Enzyme Immobilization: Principles, Materials, and Core Advantages
Key Concepts of Immobilized Enzyme Reactors
An Immobilized Enzyme Reactor (IMER) is a flow-through device where a biological catalyst (enzyme) is fixed onto a solid support, enabling continuous biocatalytic conversion of substrates. This immobilization enhances enzyme stability, allows for reuse, and facilitates product separation, making IMERs crucial tools in analytical chemistry, bioprocessing, and drug development.
Core Advantages:
- Reusability: Enzymes are retained within the reactor.
- Enhanced Stability: Immobilization often protects enzymes from denaturation.
- Continuous Processing: Enables flow-through operation for high-throughput applications.
- Product Purity: Simplified separation of enzyme from reaction products.
Common Immobilization Methods:
- Covalent Binding: Enzyme is attached via functional groups to an activated support (e.g., glutaraldehyde to amine-functionalized silica).
- Affinity Immobilization: Utilizes specific biological interactions (e.g., His-tag to Ni-NTA).
- Adsorption: Physical attachment via van der Waals or ionic forces.
- Entrapment/Encapsulation: Enzyme is enclosed within a porous polymer or gel matrix.
- Cross-Linking: Enzymes are linked to each other to form aggregates (CLEAs) or onto a support (CLEs).
Traditional Limitations of IMERs
Despite their utility, conventional IMER fabrication faces several persistent challenges that limit their performance and accessibility.
Table 1: Summary of Traditional IMER Limitations
| Limitation Category | Specific Challenge | Consequence |
|---|---|---|
| Fabrication & Design | Limited control over internal geometry (e.g., chaotic pore networks). | Poor flow distribution, high pressure drops, and mass transfer limitations. |
| Multi-step, manual fabrication processes. | Low reproducibility between batches and high operator dependency. | |
| Performance | Inefficient mass transfer (diffusion limitations). | Reduced apparent enzyme activity and lower catalytic efficiency. |
| Enzyme leaching or denaturation over time. | Loss of reactor activity and limited operational lifespan. | |
| Material & Cost | Reliance on specific, often expensive, support materials (e.g., controlled-pore glass). | High cost per reactor, limiting widespread screening applications. |
| Difficult integration of multiple enzymes or cofactors. | Challenges in creating complex, multi-step catalytic cascades. |
Thesis Context: These traditional limitations create a compelling rationale for the application of 3D printing (Additive Manufacturing) in IMER design. 3D printing offers a pathway to overcome these hurdles by enabling the precise, digital fabrication of reactors with optimized, predictable geometries, integrated multi-material functionality, and tailored fluidic paths to enhance mass transfer and performance.
Application Notes & Experimental Protocols
Protocol: Fabrication of a Traditional Packed-Bed IMER via Covalent Immobilization
This protocol details the classic method for creating a silica-based packed-bed IMER, highlighting steps that 3D printing aims to streamline or revolutionize.
Research Reagent Solutions & Essential Materials:
| Item | Function |
|---|---|
| Aminopropyl-functionalized Silica Beads (e.g., 40-63 μm) | The porous solid support providing a high surface area and reactive amine groups for enzyme attachment. |
| Glutaraldehyde Solution (2.5% v/v in phosphate buffer) | A homobifunctional crosslinker that activates the support by reacting with amine groups, providing an aldehyde terminus for enzyme coupling. |
| Enzyme Solution (e.g., Trypsin, 1 mg/mL in coupling buffer) | The biological catalyst of interest, prepared in an optimal buffer (typically phosphate, pH 7.0-8.0) without interfering nucleophiles. |
| Sodium Cyanoborohydride (NaBH₃CN, 1 mg/mL) | A reducing agent that stabilizes the Schiff base formed between enzyme amines and support aldehydes, creating a permanent covalent bond. |
| Blocking Solution (1M Ethanolamine, pH 8.0) | Quenches unreacted aldehyde groups on the support after immobilization to prevent non-specific binding during operation. |
| HPLC Empty Column (e.g., 50 mm x 4.6 mm) | The housing that contains the immobilized enzyme-packed bed to form the final reactor. |
| Peristaltic Pump & Tubing | Drives solutions through the support bed during preparation and operation. |
Methodology:
- Support Activation: Pack a small column with aminopropyl silica. Recirculate 20 column volumes (CV) of glutaraldehyde solution through the packed bed at 0.5 mL/min for 2 hours at room temperature.
- Washing: Flush the activated support with 50 CV of deionized water to remove excess crosslinker.
- Enzyme Immobilization: Recirculate 10-20 mL of the enzyme solution through the activated bed at 0.2 mL/min for 12-16 hours at 4°C. Include NaBH₃CN in the solution.
- Quenching & Blocking: Wash with coupling buffer (5 CV). Recirculate blocking solution (10 CV) for 2 hours to cap residual aldehydes.
- Final Wash & Storage: Wash sequentially with coupling buffer (10 CV), a high-salt buffer (e.g., 1M NaCl, 10 CV), and storage buffer (e.g., 20 mM phosphate, pH 7.4, 10 CV). Store the prepared IMER at 4°C.
Protocol: Activity Assay and Kinetic Characterization of an IMER
This experiment is critical for evaluating IMER performance and comparing traditionally fabricated vs. 3D-printed reactors.
Methodology:
- Reactor Setup: Connect the IMER in-line with a spectrophotometer or HPLC detector. Place it in a temperature-controlled jacket (e.g., 37°C).
- Substrate Perfusion: Prepare a solution of a chromogenic/fluorogenic substrate (e.g., Nα-benzoyl-L-arginine 4-nitroanilide for trypsin). Pump it through the IMER at a fixed flow rate (e.g., 0.1 mL/min).
- Data Collection: Monitor the product formation (e.g., p-nitroaniline at 405 nm) in the effluent until a steady-state signal is reached.
- Kinetic Analysis: Repeat Step 2 at varying substrate concentrations. Calculate the apparent kinetic parameters (KM,app and Vmax,app) by fitting the initial reaction rates vs. substrate concentration to the Michaelis-Menten model using nonlinear regression.
Table 2: Example Kinetic Data from a Hypothetical Trypsin IMER
| Substrate Concentration (mM) | Initial Reaction Rate (μmol/min) | Notes (Flow Rate, etc.) |
|---|---|---|
| 0.05 | 0.12 | Flow Rate: 0.1 mL/min |
| 0.10 | 0.21 | Temperature: 37°C |
| 0.20 | 0.33 | Buffer: 50 mM Tris-HCl, pH 8.0 |
| 0.50 | 0.48 | Detection: A405 of product |
| 1.00 | 0.52 | Calculated KM,app: ~0.15 mM |
| 2.00 | 0.54 | Calculated Vmax,app: ~0.55 μmol/min |
Visualizations
Traditional IMER Limitations Lead to Poor Performance
Covalent Enzyme Immobilization Protocol Workflow
Application Notes: 3D-Printed Biocatalytic Reactors
The integration of additive manufacturing (AM) with biocatalysis enables the rapid prototyping and production of reactors with customized geometries, integrated immobilization matrices, and enhanced mass transfer properties. These application notes detail the current capabilities and quantitative performance of 3D-printed immobilized enzyme reactors (IMERs).
Performance Metrics of Representative 3D-Printed IMERs
Table 1: Comparative performance of 3D-printed IMERs from recent literature.
| Printing Technology | Polymer/Resin | Enzyme | Immobilization Method | Max. Activity Retention (%) | Productivity (μmol/min/cm³) | Reference (Year) |
|---|---|---|---|---|---|---|
| Stereolithography (SLA) | Methacrylate-based resin | Lipase B (C. antarctica) | Covalent (surface) | 85 | 2.1 | [1] (2023) |
| Fused Deposition Modeling (FDM) | Polyethylene Terephthalate Glycol (PETG) | Laccase | Adsorption (surface) | 72 | 0.8 | [2] (2024) |
| Digital Light Processing (DLP) | Glycidyl Methacrylate (GMA) resin | Glucose Oxidase | Entrapment (bulk) | 65 | 5.4 | [3] (2023) |
| Multijet Fusion (MJF) | Polyamide 12 (PA12) | Penicillin G Acylase | Covalent (surface) | 91 | 1.7 | [4] (2024) |
Key Design Advantages
- Surface Area-to-Volume Ratio: Gyroid and lattice structures can increase surface area by 300-500% compared to solid cylinders of equal volume.
- Pressure Drop Optimization: CFD-optimized channel designs can reduce operational pressure drop by up to 70% versus packed-bed reactors.
- Rapid Iteration: Design-to-prototype cycle time is reduced from weeks (traditional machining) to hours (AM).
Experimental Protocols
Protocol: DLP Printing of a Monolithic Enzyme-Reactive Reactor
Aim: To fabricate a reactor with glycidyl methacrylate-based resin and covalently immobilize enzyme via surface epoxide groups.
Materials:
- DLP Printer: (e.g., Asiga MAX X)
- Resin: Custom glycidyl methacrylate (GMA)-based photopolymer resin.
- Software: CAD design software (e.g., SolidWorks), slicing software (e.g., Asiga Composer).
- Post-Processing: Isopropanol, compressed air, UV post-curing unit.
Procedure:
- Design: Create a reactor CAD model (e.g., 10 mm diameter x 30 mm length cylinder with internal triply periodic minimal surface (TPMS) gyroid structure, pore size 500 µm).
- Slicing: Export as STL, import to slicer. Set layer thickness to 50 µm. Generate support structures if needed. Slice to printer-specific file.
- Printing: Load GMA resin. Initiate print with recommended exposure settings (e.g., 2.5 s/layer).
- Post-Processing: a. Carefully remove printed part from build platform. b. Wash in isopropanol bath with gentle agitation for 5 min to remove uncured resin. c. Blow-dry with clean, oil-free compressed air. d. Post-cure under 405 nm UV light (10 mW/cm²) for 10 min per side.
- Activation: The reactor is now ready for enzyme coupling via nucleophilic attack on surface epoxide groups by enzyme lysine residues.
Protocol: Covalent Immobilization ofCandida antarcticaLipase B (CalB) on 3D-Printed Epoxy Reactor
Aim: To covalently attach CalB to the surface of a GMA-printed reactor.
Materials:
- 3D-printed GMA reactor.
- Candida antarctica Lipase B solution (5 mg/mL in 50 mM phosphate buffer, pH 7.5).
- Phosphate Buffer (50 mM, pH 7.5 and pH 8.0).
- Blocking Solution: 1 M ethanolamine-HCl, pH 8.0.
- Washing Solution: 50 mM phosphate buffer, pH 7.5 containing 0.5 M NaCl.
- Peristaltic pump and tubing.
Procedure:
- Equilibration: Connect the reactor to a peristaltic pump. Pump 50 mM phosphate buffer (pH 7.5) through the reactor at 0.5 mL/min for 30 min.
- Enzyme Loading: Recirculate the CalB enzyme solution (5 mg/mL) through the reactor at 0.2 mL/min for 16 hours at 4°C.
- Washing: Pump washing buffer through the reactor at 1 mL/min for 60 min to remove physically adsorbed enzyme.
- Blocking: Pass the ethanolamine blocking solution through the reactor at 0.5 mL/min for 4 hours at room temperature to deactivate remaining epoxide groups.
- Final Wash: Rinse with phosphate buffer (pH 7.5) at 1 mL/min for 30 min.
- Storage: Store the prepared IMER at 4°C in buffer until use. Determine activity retention via a standard p-nitrophenyl butyrate (pNPB) assay.
Visualizations
Title: Workflow for 3D Printing and Functionalizing an IMER
Title: Mass Transfer and Reaction in a 3D-Printed IMER
The Scientist's Toolkit: Research Reagent Solutions
Table 2: Essential materials for 3D-printed IMER research.
| Item | Function/Description | Example Supplier/Catalog |
|---|---|---|
| GMA-based Photopolymer Resin | Reactive resin providing surface epoxide groups for direct covalent enzyme coupling. | Custom synthesis or Rahn GmbH (GENOMER 4251) |
| CalB (C. antarctica Lipase B) | Model hydrolytic enzyme, robust and widely used in biocatalysis studies. | Sigma-Aldrich (CAS 9001-62-1) or c-LEcta (CALB) |
| p-Nitrophenyl Butyrate (pNPB) | Chromogenic substrate for rapid spectrophotometric activity assay of lipases/esterases. | Sigma-Aldrich (N9876) |
| Biocompatible Post-Curing Wash | For effective removal of uncured resin without damaging delicate polymer structures. | Biodegradable Bio Cleanse (Formlabs) or 100% isopropanol |
| Epoxy Group Blocking Agent | Quenches unreacted epoxides after immobilization to prevent non-specific binding. | Ethanolamine hydrochloride (Sigma-Aldrich, 398136) |
| Perfusion Bioreactor System | Provides precise fluid handling for immobilization protocols and continuous-flow biocatalysis. | Cole-Parmer Masterflex L/S with cartridge holders |
Within the broader thesis on "3D Printing for Immobilized Enzyme Reactor (IER) Design," the selection of printable matrix is critical. The ideal material must facilitate high-fidelity printing, provide structural stability under flow conditions, and maintain enzyme activity. This review critically appraises three dominant material classes—hydrogels, photopolymers, and biocompatible resins—for enzyme encapsulation, providing application-focused protocols and data.
Material Comparison and Quantitative Data
Table 1: Comparative Properties of Printable Materials for Enzyme Encapsulation
| Property | Alginate-Gelatin Hydrogels | PEGDA Photopolymers | Methacrylated Gelatin (GelMA) | Commercial Biocompatible Resin (e.g., PEGDA-based) |
|---|---|---|---|---|
| Typical Printing Tech | Extrusion (Direct Ink Write) | Vat Photopolymerization (SLA, DLP) | Extrusion or Vat Photopolymerization | Vat Photopolymerization (SLA, DLP) |
| Curing Mechanism | Ionic (Ca²⁺) / Thermal | UV-light Radical Polymerization | UV-light or Thermal | UV-light Radical Polymerization |
| Print Resolution (µm) | 200 - 500 | 25 - 100 | 50 - 200 | 25 - 150 |
| Post-Print Swelling (%) | 20 - 60 | 1 - 5 | 10 - 30 | 2 - 8 |
| Typical Enzyme Loading (mg/mL) | 5 - 20 | 1 - 10 | 5 - 25 | 0.5 - 5 |
| Activity Retention (%) | 60 - 85 | 10 - 50* | 50 - 80 | 15 - 40* |
| Compressive Modulus (kPa) | 10 - 100 | 500 - 2000 | 20 - 200 | 300 - 1000 |
| Key Advantage | High Bioactivity, Mild Gelation | High Resolution, Stability | Tunable Mechanics, Bioactive | High Resolution, Commercial Availability |
| Key Limitation | Low Mech. Strength, Swelling | Cytotoxic Monomers, Harsh Cure | UV/Photoinitiator Toxicity | Limited Enzyme Compatibility |
Note: Activity retention for UV-cured systems is highly dependent on photoinitiator type, concentration, and UV exposure dose. Values represent ranges from recent literature (2023-2024).
Application Notes and Experimental Protocols
Protocol 2.1: Enzyme Encapsulation in Alginate-Gelatin Hydrogels via Extrusion Bioprinting
Application Note: Ideal for labile enzymes (e.g., dehydrogenases, oxidases) due to aqueous, non-reactive encapsulation. Best suited for low-pressure flow reactors.
Materials (Research Reagent Solutions):
- Sodium Alginate (2-4% w/v): Primary structural polymer, crosslinks with calcium ions.
- Gelatin (5-8% w/v): Provides thermo-reversible gelation and cell-adhesion motifs.
- Target Enzyme Solution: Prepared in suitable buffer (e.g., PBS, Tris-HCl).
- Crosslinking Solution (100mM CaCl₂): Ionic crosslinker for alginate.
- Bioprinter: Pneumatic or piston-driven extrusion system with temperature-controlled stage (<15°C) and printhead (maintained at 25-30°C).
Procedure:
- Bioink Preparation: Dissolve sodium alginate and gelatin in warm buffer (37°C) under gentle stirring. Cool to 25°C. Mix with enzyme solution to final desired concentration (e.g., 10 mg/mL). Keep on ice.
- Printer Setup: Load bioink into a temperature-controlled syringe. Set build platform temperature to 10°C.
- Printing: Print lattice structure (e.g., 10x10x5 mm grid, 400 µm nozzle, 8 mm/s speed) directly into a cold collection dish.
- Crosslinking: Immediately transfer printed construct into 100mM CaCl₂ solution for 15 minutes.
- Post-Processing: Rinse with buffer to remove excess Ca²⁺. Store at 4°C until use in flow reactor. Assess activity via specific assay.
Protocol 2.2: Enzyme Entrapment in PEGDA Hydrogels via Digital Light Processing (DLP)
Application Note: Enables fabrication of high-resolution, complex monolithic reactors. UV and radical sensitivity of the enzyme is the major constraint.
Materials (Research Reagent Solutions):
- Poly(ethylene glycol) diacrylate (PEGDA, Mn 700): Biocompatible photopolymerizable monomer.
- Lithium phenyl-2,4,6-trimethylbenzoylphosphinate (LAP): Water-soluble, cytocompatible photoinitiator.
- Reactive Blue 4 (or Tartrazine): UV absorber for resolution enhancement.
- Target Enzyme Solution: In low-UV-absorbance buffer.
- DLP Printer: Equipped with 385-405 nm light source.
Procedure:
- Resin Formulation: Prepare a 20% (w/v) solution of PEGDA in enzyme buffer. Add LAP to 0.3% (w/v) and a trace amount of dye (e.g., 0.001% w/v Reactive Blue 4). Filter sterilize (0.22 µm).
- Enzyme Incorporation: Gently mix the enzyme solution with the sterile prepolymer solution on ice. Final enzyme concentration typically 1-5 mg/mL.
- Printing: Upload a 3D model (e.g., a microfluidic monolith with herringbone mixers). Print with a layer exposure time optimized for the resin (e.g., 2-4 s per 50 µm layer at 5 mW/cm²).
- Post-Printing: Immediately transfer the printed part into a large volume of cold buffer to stop the reaction and wash out unreacted monomers. Soak for 2 hours, changing buffer every 30 minutes.
- Activity Assay: Conduct activity assay in a recirculating flow setup to measure initial performance.
The Scientist's Toolkit: Essential Research Reagents
Table 2: Key Research Reagents for Printable Enzyme Encapsulation
| Reagent | Function/Critical Role |
|---|---|
| Lithium phenyl-2,4,6-trimethylbenzoylphosphinate (LAP) | Water-soluble, efficient photoinitiator for visible/UV light, less cytotoxic than Irgacure 2959. |
| Gelatin Methacryloyl (GelMA) | Combines natural bioactivity of gelatin with controllable photopolymerization; enables cell-adhesive enzyme supports. |
| Poly(ethylene glycol) diacrylate (PEGDA) | Synthetic, hydrophilic photopolymer; modulus and diffusivity tunable by molecular weight and concentration. |
| Alginate (High G-Content) | Provides mild ionic crosslinking; critical for maintaining conformation of sensitive enzymes. |
| Calcium Chloride (CaCl₂) Solution | Ionic crosslinker for alginate; concentration and chelators (e.g., citrate) control gelation kinetics and stiffness. |
| Reactive Blue 4 Dye | Acts as a photoabsorber in vat photopolymerization, greatly improving vertical print resolution. |
| Hepes Buffer | Used in photopolymer formulations due to low UV absorbance compared to Tris or buffers containing amines. |
| Pluronic F-127 | Sacrificial support material for printing hydrogels; also used as a surfactant in resin formulations. |
Diagrams
Title: Workflow for 3D Printing Enzyme-Loaded Materials
Title: Material Selection Logic for Enzyme Encapsulation
Title: UV-Curing Pathways & Enzyme Interaction
Application Notes: 3D-Printed Immobilized Enzyme Reactors (IMERs)
Recent advancements in additive manufacturing have revolutionized the design of immobilized enzyme reactors (IMERs) for biocatalysis and analytical applications. The core architectural advantages of 3D printing lie in its digital, layer-by-layer fabrication, which provides unparalleled command over reactor geometry, internal porosity, and functional surface area—key parameters dictating catalytic efficiency, fluid dynamics, and substrate binding capacity.
Note 1: Geometry-Controlled Flow Dynamics. By precisely designing channel architecture (e.g., zigzag, spiral, or gyroid), researchers can manipulate residence time distribution and reduce axial dispersion, leading to more efficient substrate-enzyme contact. Computationally optimized geometries, impossible with traditional packed-bed methods, are now directly fabricable.
Note 2: Porosity Engineering for Mass Transport. Multi-scale porosity can be engineered: macro-porous networks (100-500 µm) to minimize backpressure and facilitate bulk flow, and micro/nano-porous features (<10 µm) within struts to maximize enzyme loading sites. This hierarchical structure decouples flow resistance from surface area.
Note 3: Surface Area Modulation for Immobilization. The accessible surface area for enzyme attachment is no longer a fixed property of a porous medium. Through control of print resolution, infill patterns, and post-processing, the surface-to-volume ratio can be tuned over orders of magnitude to match specific enzyme activity and substrate molecular size.
Key Quantitative Advantages of 3D-Printed vs. Conventional IMERs: Table 1: Comparison of Architectural and Performance Parameters
| Parameter | Conventional Packed-Bed IMER | 3D-Printed (SLA/DLP) IMER | 3D-Printed (DLP with Nano-clay) | 3D-Printed (SLS) IMER |
|---|---|---|---|---|
| Feature Resolution (µm) | >500 (bead diameter) | 25 - 100 | 10 - 50 | 80 - 200 |
| Controllable Porosity (%) | 30-40 (inter-particle) | 20-80 (designed) | 40-75 (hierarchical) | 40-60 (intrinsic) |
| Surface Area / Volume (mm²/mm³) | ~10-15 | 5-20 (designed) | 15-50 (enhanced) | 5-15 |
| Max. Enzyme Loading (mg/cm³) | 15-25 | 8-20 | 20-60 | 10-20 |
| Pressure Drop (bar/cm) | High | Low-Medium (tunable) | Low | Medium |
| Design Freedom | Low (random) | Very High | Very High | High |
Data synthesized from recent literature (2023-2024) on vat photopolymerization and powder-based printing for flow reactors.
Detailed Experimental Protocols
Protocol 1: Fabrication of a High-Surface-Area Gyroid IMER via DLP 3D Printing
Objective: To fabricate a monolithic IMER with a triply periodic minimal surface (gyroid) structure for enhanced mixing and surface area.
Materials & Equipment:
- DLP 3D Printer (e.g., Asiga MAX X)
- Photopolymer resin: GM-08 (Geriatric Materials) or BiO-INK with 10% (w/w) LAP photoinitiator.
- Silane-based monomer (e.g., 3-(Trimethoxysilyl)propyl methacrylate) for resin formulation.
- Isopropanol (IPA), for post-washing.
- UV post-curing chamber.
- Phosphate Buffered Saline (PBS), pH 7.4.
- Target enzyme (e.g., Trypsin, Lysozyme).
- Cross-linking agent: Glutaraldehyde (2.5% v/v solution).
Procedure:
- Design: Use CAD software (e.g., nTopology, Rhinoceros 3D) to design a cylindrical reactor flow cell (Ø6 mm x 20 mm) with an internal gyroid lattice (unit cell size: 500 µm, porosity: 70%). Export as
.stl. - Resin Formulation: Mix photopolymer resin with 5% (v/v) silane-based monomer. Sonicate for 15 min to ensure homogeneity.
- Printing: Slice file with 25 µm layer thickness. Print using standard DLP parameters for the resin (e.g., 405 nm, 15 s base exposure, 2 s per layer).
- Post-Processing: a. Wash printed structure in IPA bath for 5 min with gentle agitation. b. Cure under UV light (365 nm) for 20 min. c. Activate surface silane groups by immersing in 1M acetic acid (pH ~3) for 1 hour. Rinse with deionized water.
- Enzyme Immobilization: a. Reactor is flushed with 10 column volumes (CV) of PBS. b. Flush with 5 CV of glutaraldehyde solution for 1 hour to functionalize surface with aldehyde groups. c. Rinse with 10 CV of PBS to remove excess glutaraldehyde. d. Recirculate enzyme solution (2 mg/mL in PBS) through the reactor at 0.1 mL/min for 12 hours at 4°C. e. Quench unreacted aldehydes with 1M ethanolamine for 30 min. f. Wash with 20 CV of PBS. Store reactor at 4°C in PBS until use.
Protocol 2: Characterization of Porosity and Surface Area
Objective: To quantitatively assess the architectural parameters of the printed IMER.
Part A: µ-CT Scanning for Geometric Fidelity and Porosity
- Mount dry IMER on sample holder.
- Scan using a desktop micro-CT system (e.g., SkyScan 1272) at 5 µm voxel resolution, 60 kV, 166 µA.
- Reconstruct images using NRecon software.
- Use CT-Analyzer software to binarize images and calculate total porosity (%), pore size distribution, and strut thickness.
Part B: Enzyme Loading Capacity via Bradford Assay
- Prepare a standard curve using Bovine Serum Albumin (BSA) in PBS (0-2 mg/mL).
- After immobilization (Step 5.d in Protocol 1), collect the initial and spent enzyme solutions.
- Perform Bradford assay in triplicate for both solutions.
- Calculate immobilized enzyme amount:
Loading (mg) = (C_initial - C_spent) * Volume. - Normalize to reactor volume for loading capacity (mg/cm³).
Diagrams
Title: 3D Printed Enzyme Reactor Workflow
Title: Architecture-Performance Relationship in IMERs
The Scientist's Toolkit: Key Research Reagent Solutions
Table 2: Essential Materials for 3D Printing High-Performance IMERs
| Item & Example | Function in IMER Development |
|---|---|
| Functionalized Resin (e.g., GM-08 with silane moieties) | Photopolymerizable matrix that provides mechanical stability and inherent chemical handles (e.g., -OH, -COOH, -SiOCH3) for subsequent enzyme coupling. |
| Photoinitiator (e.g., Lithium phenyl-2,4,6-trimethylbenzoylphosphinate - LAP) | Enables rapid, biocompatible radical polymerization under blue/violet light, critical for high-resolution DLP printing. |
| Cross-linker (e.g., Glutaraldehyde) | Bifunctional reagent that reacts with amine groups on enzyme surfaces and amine-functionalized or hydroxylated printer resin, creating stable covalent immobilization. |
| Pore Generator (e.g., Polyethylene glycol diacrylate - PEGDA) | Sacrificial porogen added to resin; leached out post-printing to create additional micro-porosity within printed struts, boosting surface area. |
| Surface Activator (e.g., (3-Aminopropyl)triethoxysilane - APTES) | Used in post-printing vapor or solution phase to introduce amine functional groups onto inert printed surfaces (e.g., from SLA resins) for enzyme attachment. |
| Enzyme Activity Assay Kit (e.g., pNA substrate for Trypsin) | Allows precise measurement of immobilized enzyme activity and kinetics (Vmax, Km) compared to free enzyme, determining immobilization efficiency. |
Application Notes for Immobilized Enzyme Reactor Design
In the context of advanced biocatalyst development, 3D printing enables the precise fabrication of reactors with tailored geometries, pore architectures, and surface chemistries. These features directly impact critical parameters such as enzyme loading, substrate diffusion, mass transfer efficiency, pressure drop, and operational stability. The selection of a printing modality is dictated by the required resolution, material biocompatibility, and the complexity of the intended flow path design.
Comparative Analysis of Modalities
Table 1: Quantitative Comparison of Primary 3D Printing Modalities
| Parameter | Stereolithography (SLA) | Digital Light Processing (DLP) | Extrusion-Based (FDM/DIW) |
|---|---|---|---|
| Typical Resolution (XY) | 25 - 140 µm | 20 - 100 µm | 50 - 400 µm |
| Build Speed | Moderate | Fast (Full layer at once) | Slow to Moderate |
| Suitable Materials | Photopolymer resins (e.g., acrylates, methacrylates) | Photopolymer resins | Thermoplastics (PLA, ABS) & Pastes (hydrogels, bioceramics) |
| Surface Finish | Excellent, Smooth | Excellent, Smooth | Layered, Rougher |
| Key Advantage for Bioreactors | High-resolution, complex internal channels | Fast production of small, high-resolution parts | Direct printing of composite biomaterials (enzyme-loaded inks) |
| Post-Processing Needs | Washing, Post-curing | Washing, Post-curing | Minimal (FDM) or Curing (DIW) |
| Material Biocompatibility | Limited (requires biocompatible resins) | Limited (requires biocompatible resins) | High (with select thermoplastics/hydrogels) |
| Relative Cost | Moderate | Moderate-High | Low |
Table 2: Impact on Bioreactor Performance Metrics
| Performance Metric | SLA/DLP Influence | Extrusion-Based Influence |
|---|---|---|
| Enzyme Loading Capacity | Determined by surface functionalization post-print. | Can be pre-mixed into printing ink (Direct Ink Writing). |
| Mass Transfer Efficiency | Enhanced by printing optimized lattice/gyroid channel designs. | Governed by printed filament porosity and infill pattern. |
| Pressure Drop | Precisely tunable via channel diameter and geometry. | Higher risk of irregular channels affecting flow. |
| Operational Stability | Dependent on resin stability in aqueous/buffered conditions. | Can leverage robust, inert thermoplastics (e.g., PP). |
Experimental Protocols
Protocol 1: Fabrication of a Monolithic Enzyme Reactor via SLA/DLP
Objective: To create a high-resolution, continuous-flow enzyme reactor with immobilized lipase for kinetic studies. Materials: Biocompatible, functionalizable resin (e.g., methacrylate-based), IPA (≥99.7%), PBS buffer (pH 7.4), (3-Aminopropyl)triethoxysilane (APTES), Glutaraldehyde, Lipase solution. Method:
- Design: Model a reactor (e.g., 10 mm x 10 mm x 30 mm) with a sinusoidal or gyroid internal flow channel (diameter: 500 µm) using CAD software. Export as
.stl. - Printing: Load the
.stlfile into the printer slicer (e.g., ChituBox for SLA). Orient to minimize supports. Print using manufacturer-recommended settings (e.g., layer height: 50 µm, exposure time: 2 s). - Post-Processing:
- Transfer the printed part into an IPA bath and agitate gently for 5 minutes to remove uncured resin. Repeat with fresh IPA.
- Cure under UV light (405 nm) for 20 minutes.
- Surface Functionalization & Enzyme Immobilization:
- Immerse the reactor in 2% (v/v) APTES in toluene for 2 hours at 70°C. Rinse with toluene and dry.
- Flush the reactor with 2.5% (v/v) glutaraldehyde in PBS for 1 hour at room temperature.
- Rinse with PBS, then flush with 2 mg/mL lipase in PBS (pH 7.4) for 12 hours at 4°C.
- Finally, flush with PBS to remove unbound enzyme. Store at 4°C until use.
Protocol 2: Direct Ink Writing (DIW) of a Carbon Nanotube (CNT)-Enzyme Composite Reactor
Objective: To extrude a conductive, enzymatically active monolithic bioreactor for electrochemical sensing applications. Materials: Multi-walled carbon nanotubes (MWCNTs), Alginate solution (4% w/v), CaCl₂ solution (100 mM), Lysozyme enzyme, Glycerol. Method:
- Ink Preparation: Homogenize 5% (w/w) MWCNTs in 4% alginate solution. Add 10% (v/v) glycerol as a plasticizer. Mix thoroughly until a homogeneous, viscous paste is formed. Keep on ice.
- Enzyme Incorporation: Gently mix lysozyme into a separate aliquot of ink to a final concentration of 5 mg/mL. Avoid introducing air bubbles.
- Printing: Load ink into a syringe barrel fitted with a tapered nozzle (e.g., 410 µm). Print a 3D lattice structure (15 mm cube, 60% infill) onto a build platform. Use a pneumatic pressure of 25-30 psi and a print speed of 8 mm/s.
- Cross-linking: Immediately after printing, mist the structure with 100 mM CaCl₂ solution to ionically cross-link the alginate. Incubate for 30 minutes.
- Conditioning: Rinse the reactor gently with 50 mM phosphate buffer (pH 6.5) to remove excess Ca²⁺ and unincorporated enzyme. The reactor is now ready for use in flow-through enzymatic activity assays.
Visualizations
SLA/DLP Enzyme Reactor Fabrication
DIW of CNT-Enzyme Composite Reactor
The Scientist's Toolkit
Table 3: Key Research Reagent Solutions for 3D Printed Bioreactors
| Item | Function in Research | Example/Specification |
|---|---|---|
| Biocompatible Photoresin | Base material for SLA/DLP printing of reactor structures. Must allow subsequent surface chemistry. | Methacrylate-based resin (e.g., PEGDA, Bisphenol A glycidyl methacrylate). |
| Functional Silane (APTES) | Provides surface amine (-NH₂) groups on printed parts for covalent enzyme attachment. | (3-Aminopropyl)triethoxysilane, ≥98%. |
| Cross-linking Agent | Creates covalent bonds between surface functional groups and enzymes. | Glutaraldehyde solution, 25% in H₂O. |
| Enzyme of Interest | The biocatalyst to be immobilized. Purity and activity are critical. | Lysozyme, Lipase B, Laccase, etc., high purity. |
| DIW Hydrogel Base | Shear-thinning biopolymer for extrusion-based printing of soft reactors. | Sodium alginate, 4-6% w/v in buffer. |
| Conductive Nanomaterial | Enhances composite ink conductivity for electrochemical bioreactors. | Multi-walled Carbon Nanotubes (MWCNTs), carboxylated. |
| Cross-linking Ion Solution | Gelates alginate-based inks post-printing to form stable structures. | Calcium chloride (CaCl₂), 100-200 mM. |
| Post-processing Solvent | Removes uncured, potentially toxic resin from SLA/DLP printed parts. | Isopropanol (IPA), ≥99.7% purity. |
From Digital Design to Functional Bioreactor: A Step-by-Step Guide to 3D Printing IMERs
Within the broader thesis on advancing 3D printing for bioprocess intensification, this application note details a standardized workflow for fabricating Immobilized Enzyme Reactors (IMERs). These continuous-flow bioreactors are critical for research in biocatalysis, metabolite synthesis, and drug development, offering enhanced enzyme stability, reusability, and precise control over reaction parameters. The integration of additive manufacturing allows for unprecedented geometric control over fluid dynamics and surface-to-volume ratios, directly impacting reactor performance metrics such as conversion efficiency, pressure drop, and residence time distribution.
Detailed Workflow
CAD Design Phase
The design phase focuses on creating a 3D model that balances hydrodynamic performance with structural integrity for subsequent functionalization.
- Objective: Generate a reactor geometry that maximizes enzyme-support interfacial area, promotes uniform laminar flow to minimize shear stress on immobilized enzymes, and allows for easy integration into analytical setups (e.g., HPLC, LC-MS).
- Key Parameters: Channel diameter, pore size (for monolithic designs), mixing elements, overall dimensions, and connector interfaces.
- Protocol - Computational Fluid Dynamics (CFD) Pre-Screening:
- Model Export: Export the CAD design (typically as an STL or STEP file) from software (e.g., SolidWorks, Fusion 360, FreeCAD).
- Mesh Generation: Import the geometry into CFD software (e.g., ANSYS Fluent, COMSOL Multiphysics, or openFOAM). Generate a computational mesh, ensuring refinement near channel walls.
- Boundary Conditions: Define inlet flow rate (e.g., 0.1-1.0 mL/min) and outlet pressure. Set fluid properties to match the intended buffer (e.g., aqueous solution, viscosity ~1 cP).
- Simulation Run: Execute a steady-state, laminar flow simulation.
- Analysis: Evaluate velocity streamlines, wall shear stress (target: < 5 Pa to preserve enzyme activity), and pressure drop across the reactor. Optimize geometry iteratively based on results.
Material Selection
Material choice dictates printability, biocompatibility, and available surface chemistry for enzyme immobilization.
Table 1: Comparative Analysis of Common 3D Printing Materials for IMER Fabrication
| Material | Print Technology | Key Advantages | Limitations | Recommended Surface Activation for Immobilization |
|---|---|---|---|---|
| Methacrylate-based Resin | Stereolithography (SLA), Digital Light Processing (DLP) | High resolution (~25-100 µm), smooth surface finish, good mechanical stability. | Limited chemical resistance to organic solvents, potential for uncured monomers. | Oxygen plasma treatment followed by (3-Aminopropyl)triethoxysilane (APTES) grafting. |
| Polylactic Acid (PLA) | Fused Deposition Modeling (FDM) | Low cost, biocompatible, readily available. | Layered structure, surface roughness, low thermal/chemical resistance. | Alkaline hydrolysis (e.g., 1M NaOH) to increase surface carboxyl groups. |
| Polyethylene Glycol Diacrylate (PEGDA) | Projection Micro-stereolithography (PµSL) | Highly biocompatible, tunable porosity, transparent. | Swelling in aqueous solutions, moderate mechanical strength. | Direct covalent coupling via terminal acrylate groups to thiol-functionalized enzymes. |
| High-Temp Resins (e.g., Bismaleimide) | Material Jetting, MultiJet Fusion | Excellent chemical resistance, high thermal stability for sterilization. | Expensive, complex post-processing, limited biocompatibility data. | Silanization or plasma polymerization with functional monomers. |
Printing Phase
A generalized protocol for printing with biocompatible resins using vat photopolymerization.
- Protocol - StereoLithography Apparatus (SLA) Printing:
- Pre-processing: Load the optimized CAD file into the printer's slicing software (e.g., Chitubox, Formlabs PreForm). Orient the model to minimize supports on critical internal surfaces. Generate supports and slice into layers (set layer height to 50-100 µm for a balance of speed and resolution).
- Resin Preparation: Select a biocompatible, functionalizable resin (e.g., methacrylate-based). Gently mix resin to ensure homogeneity and pour into the printer's vat. Avoid bubbles.
- Print Execution: Initiate the print. Key printer parameters must be calibrated:
- Exposure Time: 8-15 seconds per layer (material-dependent).
- Light Intensity: 100-150 mW/cm².
- Lift Speed: 60-100 mm/min to reduce suction forces.
- In-process Quality Control: Monitor the print for layer delamination or support failure. A successful print will show precise, clean channel features without debris.
Post-Processing & Functionalization
This critical phase prepares the inert polymer structure for enzyme attachment.
- Protocol - Post-Printing Treatment and Enzyme Immobilization:
- Cleaning: Transfer the printed IMER to an ultrasonic bath containing isopropanol (IPA) for 5-10 minutes to remove uncured resin. Repeat with fresh IPA. For FDM-printed PLA, skip to step 3.
- Post-Curing: Cure the cleaned IMER under a UV light source (λ=405 nm) for 30-60 minutes to ensure complete polymerization and enhance mechanical stability.
- Surface Activation:
- For SLA Resins/Plasma Treatment: Place the IMER in a plasma cleaner. Evacuate the chamber and introduce oxygen gas (50-100 sccm). Apply RF power (50-100 W) for 2-5 minutes to generate surface hydroxyl and carboxyl groups.
- For Silanization (APTES): Immerse the plasma-treated IMER in a 2% (v/v) solution of APTES in anhydrous toluene for 2 hours at room temperature. Rinse thoroughly with toluene and methanol, then cure at 110°C for 30 min.
- Enzyme Immobilization (Covalent via EDC/NHS Chemistry): a. Prepare a 0.1 M MES buffer (pH 5.5) containing 20-50 mg/mL of the target enzyme (e.g., lipase, protease). b. Activate surface carboxyl groups by circulating a solution of 0.4 M EDC and 0.1 M NHS in MES buffer through the IMER for 30 minutes. c. Flush with cold MES buffer to stop the activation reaction. d. Circulate the enzyme solution through the activated IMER at 4°C for 12-18 hours. e. Wash the IMER extensively with phosphate buffer (pH 7.4) and then with a 1 M NaCl solution to remove physically adsorbed enzyme.
- Activity Assay: Determine immobilization yield and activity by comparing protein concentration (via Bradford assay) and specific enzymatic activity (using a model substrate) in the initial and wash solutions.
Visualized Workflows
Title: IMER Fabrication and Optimization Workflow
Title: Surface Chemistry for Covalent Enzyme Immobilization
The Scientist's Toolkit
Table 2: Key Research Reagent Solutions for IMER Development
| Reagent/Material | Function | Example Use Case/Note |
|---|---|---|
| Biocompatible Photopolymer Resin | Primary construction material for vat polymerization. | Formlabs BioMed or Dental SG resins; must be post-cured and extracted thoroughly. |
| (3-Aminopropyl)triethoxysilane (APTES) | Silane coupling agent to introduce amine (-NH2) groups on oxide surfaces. | Enables covalent linkage to enzyme carboxyl groups after surface oxidation. |
| 1-ethyl-3-(3-dimethylaminopropyl)carbodiimide (EDC) | Zero-length crosslinker; activates carboxyl groups for amide bond formation. | Used with NHS to stabilize the reactive intermediate. Critical for covalent immobilization. |
| N-hydroxysuccinimide (NHS) | Stabilizes the EDC-activated ester intermediate, improving coupling efficiency. | Always used in conjunction with EDC in a molar ratio of ~1:2.5 (NHS:EDC). |
| Bradford Reagent | Colorimetric assay for quantifying protein concentration. | Used to determine enzyme loading yield on the IMER by measuring wash-through. |
| p-Nitrophenyl Butyrate (p-NPB) | Chromogenic model substrate for esterase/lipase activity assays. | Hydrolysis releases yellow p-nitrophenol, measurable at 405 nm, to assess IMER activity. |
| Phosphate Buffered Saline (PBS), pH 7.4 | Standard washing and equilibration buffer. | Used for rinsing, storage, and as a reaction medium for many enzymatic assays. |
| 2-(N-morpholino)ethanesulfonic acid (MES) Buffer, pH 5.5 | Optimal buffer for EDC/NHS coupling reactions. | Provides an acidic environment (pH 4.7-6.5) that maximizes EDC efficiency. |
This document serves as a detailed application note within a broader thesis on 3D printing for immobilized enzyme reactor (IER) design. The integration of enzymes into 3D-printed structures is pivotal for creating efficient, reusable biocatalytic systems in drug development and analytical chemistry. This note compares two principal strategies: Direct Immobilization (enzyme incorporation during the printing process) and Post-Printing Immobilization (enzyme attachment after scaffold fabrication). We provide protocols, data, and tools to guide researchers in selecting and optimizing the appropriate methodology.
Table 1: Direct vs. Post-Printing Immobilization: Key Performance Metrics
| Parameter | Direct Immobilization | Post-Printing Immobilization |
|---|---|---|
| Typical Enzyme Activity Retention | 40-70% | 60-95% |
| Immobilization Yield | High (>90%) | Variable (50-95%) |
| Process Flexibility | Low | High |
| Spatial Control | Excellent (μm resolution) | Good (mm resolution) |
| Material Compatibility | Restricted to print-compatible matrices (e.g., alginate, PEGDA) | Broad (wide range of functionalized polymers, ceramics) |
| Key Advantage | Single-step fabrication, precise spatial patterning | Mild conditions preserve enzyme activity, versatile support choice |
| Key Limitation | Harsh printing conditions (UV, shear stress, temperature) can denature enzymes | Multi-step process, potential for non-uniform binding and leaching |
Table 2: Common Materials and Immobilization Chemistries
| Strategy | Support Material | Immobilization Method | Common Coupling Chemistry |
|---|---|---|---|
| Direct | Alginate, Gelatin, PEGDA, Pluronic F127 | Entrapment, Cross-linking during extrusion | Physical entrapment, UV-induced cross-linking |
| Post-Printing | Functionalized Resins (epoxy, methacrylate), PLA, Nylon, Silica | Adsorption, Covalent Binding, Affinity | EDC/NHS (amine-carboxyl), Glutaraldehyde (amine-amine), Streptavidin-Biotin |
Experimental Protocols
Protocol 3.1: Direct Immobilization via Extrusion-Based Bio-printing
Objective: To fabricate an enzyme-laden hydrogel filament for reactor printing. Materials: Lyophilized enzyme (e.g., Candida antarctica Lipase B), sodium alginate (4% w/v), calcium chloride (100 mM), glycerol (15% v/v as plasticizer), phosphate buffer (50 mM, pH 7.4). Procedure:
- Ink Preparation: Dissolve enzyme (2 mg/mL final) in phosphate buffer. Mix this solution with sodium alginate solution to achieve a final alginate concentration of 3% w/v. Add glycerol. Homogenize gently at 4°C to avoid bubble formation.
- Printing: Load ink into a syringe-based extruder (20°C). Print onto a substrate pre-coated with a thin film of 2% agarose to prevent adhesion.
- Cross-linking: Immediately after printing, immerse the structure in 100 mM CaCl₂ solution for 20 min to ionically cross-link the alginate and entrap the enzyme.
- Rinsing: Rinse the printed reactor three times with phosphate buffer to remove unentrapped enzyme and excess Ca²⁺.
- Activity Assay: Perform standard activity assay (e.g., using p-nitrophenyl palmitate for lipase).
Protocol 3.2: Post-Printing Covalent Immobilization on a Functionalized 3D-Printed Scaffold
Objective: To covalently attach an amine-containing enzyme (e.g., Lysozyme) to an epoxy-functionalized 3D-printed scaffold. Materials: 3D-printed scaffold (e.g., Glycidyl methacrylate (GMA)-based resin), enzyme solution (2 mg/mL in 50 mM carbonate buffer, pH 9.0), carbonate buffer (50 mM, pH 9.0), blocking solution (1M ethanolamine, pH 9.0), wash buffer (50 mM Tris-HCl, 0.1% Tween-20, pH 7.4). Procedure:
- Scaffold Activation: Clean printed GMA-scaffold in ethanol and dry. The epoxy groups are inherently reactive.
- Immobilization: Submerge the scaffold in the enzyme solution. Incubate at 25°C with gentle agitation for 16 hours. The nucleophilic amine groups on the enzyme react with the epoxy groups on the scaffold.
- Blocking: Remove scaffold and rinse briefly with carbonate buffer. Transfer to 1M ethanolamine solution for 2 hours to block any unreacted epoxy groups.
- Washing: Wash the scaffold sequentially with carbonate buffer, wash buffer (to remove non-covalently bound enzyme), and finally with storage buffer (e.g., phosphate buffer).
- Activity Assay: Perform activity assay (e.g., using Micrococcus lysodeikticus cells for lysozyme).
Visualization: Strategy Workflow and Decision Pathway
Title: Decision Pathway for Immobilization Strategy Selection
Title: Direct and Post-Printing Immobilization Workflows
The Scientist's Toolkit: Essential Research Reagents & Materials
Table 3: Key Reagent Solutions for Enzyme Immobilization in 3D Printing
| Item | Function & Relevance | Example Product/Chemical |
|---|---|---|
| Photo-crosslinkable Polymer | Forms hydrogel matrix under UV light for direct printing with enzymes. | Poly(ethylene glycol) diacrylate (PEGDA), GelMA |
| Bio-ink Rheology Modifier | Adjusts viscosity and shear-thinning behavior for printability. | Nanocellulose, Silica nanoparticles, Alginate |
| Cross-linking Agent | Creates covalent bonds between enzyme and functionalized scaffold. | Glutaraldehyde, EDC (1-Ethyl-3-(3-dimethylaminopropyl)carbodiimide) with NHS (N-Hydroxysuccinimide) |
| Blocking Agent | Quenches unreacted functional groups post-immobilization to reduce non-specific binding. | Ethanolamine, Bovine Serum Albumin (BSA), Glycine |
| Activity Assay Substrate | Quantifies immobilized enzyme performance. | p-Nitrophenyl derivatives (for hydrolases), O-Dianisidine (for peroxidases) |
| Functionalized Printing Resin | Provides reactive handles (epoxy, amine, carboxyl) for post-printing covalent coupling. | GMA-based resin (epoxy), APTES-coated silica resin (amine) |
| Wash Buffer with Surfactant | Removes physisorbed enzyme after immobilization to ensure stable binding. | Tris-HCl or PBS with 0.05-0.1% Tween-20 |
The integration of continuous-flow biocatalysis with advanced reactor engineering represents a paradigm shift in pharmaceutical manufacturing. This application note situates this technology within a broader thesis on 3D Printing for Immobilized Enzyme Reactor (IER) Design. 3D printing enables the precise fabrication of reactor geometries with tailored surface chemistry, fluidic pathways, and hierarchical porosity, which are critical for optimizing enzyme loading, substrate residence time, and mass transfer. The move from traditional batch processing to continuous flow in biocatalysis demands novel reactor architectures, which additive manufacturing is uniquely positioned to provide. This synergy enhances process intensification, scalability, and sustainability in synthesizing chiral intermediates and active pharmaceutical ingredients (APIs).
Recent literature highlights the performance gains from 3D-printed continuous-flow biocatalytic systems. Key metrics include productivity (space-time yield, STY), enzyme stability (half-life or operational stability), and conversion/selectivity.
Table 1: Performance Metrics of Recent Continuous-Flow Biocatalysis Systems for Pharmaceutical Intermediates
| Enzyme Class / Reaction | Immobilization Method | Reactor Type / Material (Fabrication) | Temp (°C) | Residence Time (min) | Conversion (%) | Selectivity (ee%) | Productivity (STY, g L⁻¹ h⁻¹) | Operational Stability (Time/Loss) | Reference (Year) |
|---|---|---|---|---|---|---|---|---|---|
| Transaminase (Chiral amine synthesis) | Covalent on functionalized polymer | 3D-printed packed-bed (Resin, SLA) | 37 | 30 | >99 | >99 | 15.6 | 7 days / <10% activity loss | Adv. Synth. Catal. (2023) |
| Ketoreductase (Chiral alcohol synthesis) | CLEA (Cross-Linked Enzyme Aggregates) | 3D-printed monolithic mixer-reactor (Metal, SLM) | 30 | 15 | 98 | 99.5 | 42.3 | >20 batches / no loss | Org. Process Res. Dev. (2024) |
| Nitrilase (Acid synthesis) | Adsorption on 3D-printed graphene oxide composite | Continuous tubular reactor (TPU, FDM) | 25 | 60 | 95 | N/A | 8.9 | 48h continuous / 15% loss | Chem. Eng. J. (2023) |
| P450 Monooxygenase (C-H activation) | Encapsulation in silica gel | 3D-printed capillary array (Glass, DLP) | 28 | 120 | 75 | 98 | 2.1 | Limited by cofactor recycling | ACS Catal. (2024) |
Detailed Experimental Protocols
Protocol 1: Immobilization of Transaminase on 3D-Printed Functionalized Reactor
Aim: To covalently immobilize a ω-transaminase onto the surface of a 3D-printed methacrylate-based monolith for continuous synthesis of a chiral amine intermediate.
Materials:
- 3D-Printed Monolith: Fabricated via Stereolithography (SLA) using a resin containing glycidyl methacrylate (GMA) as a functional monomer.
- Enzyme Solution: Recombinant ω-transaminase (25 mg/mL) in 50 mM potassium phosphate buffer, pH 7.5.
- Activation/Reaction Buffers: 50 mM phosphate buffer (pH 7.5), 1 M ethylenediamine (pH adjusted to 9.0), 2.5% glutaraldehyde in phosphate buffer.
Procedure:
- Reactor Fabrication & Cleaning: Design a cylindrical monolith with a gyroid infill pattern (pore size ~500 µm) using CAD software. Print using SLA. Post-cure under UV light for 30 min. Wash thoroughly with ethanol and deionized water.
- Surface Amine Functionalization: Flush the monolith with 1 M ethylenediamine solution (pH 9.0) at 0.5 mL/min for 12 hours at 25°C to react with surface epoxy groups, introducing primary amines.
- Activation with Glutaraldehyde: Wash with phosphate buffer. Flush with 2.5% glutaraldehyde solution for 2 hours at 4°C. Rinse extensively with buffer to remove unreacted crosslinker.
- Enzyme Immobilization: Circulate the transaminase solution through the activated monolith at 0.2 mL/min for 16 hours at 4°C.
- Quenching and Washing: Pass 1 M glycine solution (pH 8.0) for 1 hour to block remaining aldehyde groups. Wash with phosphate buffer and then with 1 M NaCl to remove weakly adsorbed enzyme. Store at 4°C in buffer until use.
Protocol 2: Continuous-Flow Biocatalytic Reduction in a 3D-Printed Mixer-Reactor
Aim: To perform the continuous asymmetric synthesis of a chiral alcohol intermediate using ketoreductase CLEAs packed in a 3D-printed stainless steel mixer-reactor.
Materials:
- 3D-Printed Reactor: A cylindrical reactor with integrated static mixing elements (e.g., Kenics type) fabricated via Selective Laser Melting (SLM).
- Biocatalyst: Ketoreductase CLEAs (prepared separately by precipitation with ammonium sulfate and cross-linking with glutaraldehyde).
- Reaction Solution: 50 mM ketone substrate in 100 mM potassium phosphate buffer (pH 7.0) containing 10% (v/v) isopropanol (as co-substrate for cofactor recycling).
- Cofactor: NADP⁺ (0.2 mM).
Procedure:
- Reactor Packing: Gently pack the reactor chamber (volume = 2 mL) with ketoreductase CLEAs. Avoid over-packing to prevent high back-pressure.
- System Priming: Connect the reactor to an HPLC pump and a back-pressure regulator (set to 2 bar). Prime the entire flow system with phosphate buffer at 0.5 mL/min until stable pressure is achieved.
- Continuous Reaction: Switch the feed to the reaction solution containing substrate and NADP⁺. Initiate flow at the desired residence time (e.g., 0.133 mL/min for 15 min residence time). Maintain temperature at 30°C using a column oven.
- Sampling & Monitoring: Collect effluent stream fractions. Analyze by chiral HPLC to determine conversion and enantiomeric excess (ee). Monitor productivity over time to assess operational stability.
- Shutdown: At experiment conclusion, flush the reactor with buffer, then with 20% ethanol/water for storage at 4°C.
Visualizations
Diagram 1: Workflow for 3D Printed Enzyme Reactor Application
Diagram 2: Ketoreductase Catalytic Cycle with Cofactor Recycling
The Scientist's Toolkit: Research Reagent Solutions
Table 2: Essential Materials for 3D-Printed Continuous-Flow Biocatalysis Research
| Item / Reagent Solution | Function / Explanation |
|---|---|
| Functionalized 3D-Printing Resins (e.g., GMA-based) | Provides epoxy surface groups for subsequent covalent enzyme immobilization. Enables one-step fabrication of functional scaffolds. |
| Recombinant Enzyme Kits (Transaminase, KRED, etc.) | High-purity, well-characterized enzymes for reproducible immobilization and kinetic studies. Often supplied with optimized buffers. |
| Cross-Linkers (Glutaraldehyde, Genipin) | For creating CLEAs or covalently attaching enzymes to amine-functionalized surfaces. Critical for enhancing enzyme stability under flow conditions. |
| Cofactor Recycling Systems (NAD(P)H, PLP) | Includes enzyme-coupled (GDH, G6PDH) or substrate-coupled (iPrOH, lactate) systems for efficient, continuous cofactor regeneration in flow. |
| Chiral HPLC Columns & Standards | Essential for real-time analysis of conversion and enantiomeric excess (ee) of pharmaceutical intermediates. |
| Precision Syringe/ HPLC Pumps & PFA Tubing | Provides pulse-free, accurate fluid delivery essential for maintaining defined residence times in continuous-flow experiments. |
| Online Spectrophotometer / FTIR Flow Cell | Allows for real-time monitoring of reaction progress (e.g., NADH absorption, substrate depletion) integrated into the flow line. |
| Back-Pressure Regulators (BPR) | Maintains constant pressure, prevents outgassing of solvents, and ensures liquid phase throughout the reactor, especially with mixed aqueous/organic solvents. |
Application Notes
The integration of 3D printing into the fabrication of enzymatic biosensors and diagnostic platforms represents a paradigm shift within the broader research on 3D-printed immobilized enzyme reactors (IMERs). This technology enables the rapid prototyping and production of devices with bespoke geometries, integrated fluidics, and precisely controlled immobilization matrices, directly translating IMER design principles into functional analytical tools. Key advantages include the creation of monolithic, multi-material devices that incorporate electrodes, enzymatic recognition elements, and sample handling systems in a single print, significantly reducing assembly complexity and improving reproducibility. Current research focuses on leveraging the spatial control afforded by 3D printing to pattern enzymes with specific bio-inks, co-print conductive nanocomposites for electrochemical sensing, and fabricate complex, porous architectures that enhance substrate diffusion and sensor response. The primary application thrusts are toward point-of-care (POC) diagnostics for biomarkers (e.g., glucose, lactate, pathogens), environmental monitoring, and in-line bioprocess analysis.
Protocol 1: Fabrication of a Multi-Material Electrochemical Lactate Biosensor
This protocol details the fabrication of a 3D-printed, amperometric lactate biosensor, integrating a conductive working electrode, an enzymatic layer, and a protective membrane.
- Objective: To construct a disposable lactate biosensor for quantification in physiological samples.
- Principle: Lactate oxidase (LOx) is immobilized onto a 3D-printed carbon-based electrode. In the presence of lactate, LOx catalyzes its oxidation, producing hydrogen peroxide (H₂O₂), which is then electrochemically oxidized at the electrode surface at a set potential. The resulting current is proportional to lactate concentration.
Materials & Reagents:
- 3D printer (e.g., stereolithography (SLA) for high resolution, or fused deposition modeling (FDM) with conductive filament).
- Conductive graphene/PLA or carbon-black nanocomposite filament.
- Insulating (e.g., clear PLA) resin/filament.
- Lactate oxidase (LOx) from Aerococcus viridans.
- Chitosan solution (2% w/v in 1% acetic acid).
- Glutaraldehyde solution (2.5% v/v).
- Phosphate buffer saline (PBS, 0.1 M, pH 7.4).
- Lactate standard solutions (0-20 mM).
- Potentiostat.
Procedure:
- Device Design & Printing: Design a three-electrode cell (working, pseudo-reference, counter) in CAD software. The working electrode (WE) should feature a porous or textured surface design. Print the WE with conductive filament. Print the outer housing and fluidic channels with insulating material.
- Surface Activation (Optional): Polish the WE surface with fine abrasive paper. Electrochemically clean/activate the WE by cyclic voltammetry (CV) in 0.5 M H₂SO₄ (e.g., 10 cycles from -0.5 to +1.5 V vs. internal Ag pseudo-reference).
- Enzyme Immobilization: Prepare an enzyme-bio-ink: Mix 50 µL of LOx (10 mg/mL in PBS), 100 µL of chitosan solution, and 5 µL of glutaraldehyde. Vortex gently. Deposit 5 µL of the mixture onto the WE surface. Allow to crosslink for 1 hour at 4°C.
- Sensor Assembly & Calibration: Assemble the printed parts. Connect the electrodes to a potentiostat. Perform amperometry at +0.7 V vs. internal reference in stirred PBS. Inject increasing concentrations of lactate standard. Record the steady-state current.
- Sample Measurement: Dilute the sample (e.g., serum, sweat) in PBS 1:10. Inject into the sensor and record the current response. Calculate concentration from the calibration curve.
Protocol 2: SLA-Printing of a Microfluidic Diagnostic Platform with Entrapped Alkaline Phosphatase
This protocol describes the creation of a microfluidic chip with covalently entrapped alkaline phosphatase (ALP) for colorimetric detection of enzymatic activity, applicable as a component in immunoassays.
- Objective: To fabricate a monolithic microfluidic device with integrated enzymatic reactors for colorimetric signal generation.
- Principle: ALP is covalently incorporated into the polymer matrix of an SLA-printed chip. Upon flowing the substrate p-nitrophenyl phosphate (pNPP) through the chip, ALP catalyzes its conversion to yellow p-nitrophenol, detectable via absorbance.
Materials & Reagents:
- SLA 3D Printer (405 nm wavelength).
- Methacrylated resin (e.g., PEGDA).
- Alkaline Phosphatase (ALP), lyophilized powder.
- Photoinitiator (e.g., LAP).
- p-Nitrophenyl phosphate (pNPP) tablets.
- Diethanolamine (DEA) buffer (1 M, pH 9.8).
- Microfluidic tubing and syringe pump.
Procedure:
- Bio-resin Formulation: Dissolve 2% (w/v) LAP in PEGDA. Gently mix in ALP to a final concentration of 1 mg/mL. Protect from light.
- Chip Printing: Design a serpentine microchannel (e.g., 500 µm width, 300 µm height) with inlet/outlet ports. Slice the model and print using the ALP-doped bio-resin. Use standard SLA printing parameters appropriate for the resin.
- Post-processing: Post-print, wash the chip with PBS for 15 minutes to remove uncured resin and any loosely bound enzyme. Cure under UV light for an additional 30 minutes.
- Activity Assay: Connect the chip outlet to a UV-Vis flow cell. Prepare 5 mM pNPP in DEA buffer. Flow the substrate through the chip at 50 µL/min using a syringe pump. Monitor the absorbance of the effluent at 405 nm.
- Kinetic Analysis: Vary flow rates to assess residence time and conversion efficiency. Calculate apparent activity of the entrapped enzyme.
Data Presentation
Table 1: Performance Comparison of Recent 3D-Printed Enzymatic Biosensors (2022-2024)
| Analytic | Printing Technology | Immobilization Method | Linear Range | Sensitivity | Stability | Reference (Example) |
|---|---|---|---|---|---|---|
| Glucose | FDM/Conductive | Adsorption on CNT/PLA | 0.1-20 mM | 37.2 nA/mM | 95% (15 days) | Anal. Chim. Acta 2023 |
| Lactate | SLA/DLP | Covalent (Chitosan/GA) in gel | 0.5-25 mM | 0.12 µA/mM | 90% (10 days) | Biosens. Bioelectron. 2024 |
| Cholesterol | Inkjet (Polyjet) | Entrapment in PEDOT:PSS | 0.05-10 mM | 4.7 µA/mM·cm² | 87% (30 days) | ACS Sensors 2023 |
| H₂O₂ | FDM/Conductive | Prussian Blue + HRP adsorption | 10-1000 µM | 0.33 A·M⁻¹·cm⁻² | 80% (100 cycles) | Sens. Actuators B 2022 |
Table 2: Key Research Reagent Solutions for 3D-Printed Enzymatic Biosensors
| Item | Function/Description | Example Product/Chemical |
|---|---|---|
| Conductive Nanocomposite Filament | Forms the electrochemical transducer; often contains graphene, carbon black, or CNTs in a PLA/Polymer matrix. | Protopasta Conductive Graphene PLA, BlackMagic 3D Conductive Filament. |
| Methacrylated Bio-Resin (for SLA) | Photocurable polymer precursor that allows for covalent enzyme entrapment during printing. | Poly(ethylene glycol) diacrylate (PEGDA), GelMA (Gelatin Methacryloyl). |
| Enzyme-Stabilizing Bio-Ink Additives | Maintains enzyme activity during and after the printing process. | Chitosan, Bovine Serum Albumin (BSA), Glycerol, Trehalose. |
| Crosslinking Agents | Creates stable covalent bonds for enzyme immobilization onto printed surfaces or within matrices. | Glutaraldehyde (GA), N-(3-Dimethylaminopropyl)-N′-ethylcarbodiimide (EDC). |
| Electrochemical Mediators | Shuttles electrons between enzyme active site and electrode, lowering operating potential. | Potassium ferricyanide, Prussian Blue, Methylene Green. |
| Blocking Buffers | Reduces non-specific adsorption on sensor surfaces post-fabrication. | Casein in PBS, SuperBlock (PBS). |
Visualizations
Title: Signaling Pathway for a 3D-Printed Lactate Biosensor
Title: Workflow for a Multi-Material 3D-Printed Biosensor
This application note exists within a doctoral thesis investigating the design and fabrication of immobilized enzyme reactors (IMERs) using advanced 3D printing techniques. The core thesis posits that additive manufacturing enables unprecedented spatial control over enzyme immobilization, facilitating the creation of complex, functionally-graded, and tissue-mimetic architectures. These architectures are critical for moving beyond oversimplified 2D models in drug metabolism studies. This document details the application of 3D-printed multi-enzyme cascade reactors and tissue-mimetic constructs to model phase I and phase II drug metabolism, offering protocols and data for their implementation.
Application Notes
Rationale for 3D-Printed Multi-Enzyme Systems
Conventional hepatocyte models often fail to maintain stable expression of cytochrome P450 (CYP) enzymes and phase II conjugating enzymes. 3D printing allows for the precise co-localization of multiple enzymes in a defined, biomimetic spatial arrangement within a porous scaffold, mimicking the zonation and metabolic cooperation found in the liver lobule. This enhances metabolic pathway efficiency and stability.
Key Advantages of Tissue-Mimetic Constructs
- Spatial Gradients: Printing with bioinks containing varying enzyme concentrations can model periportal vs. pericentral metabolic zonation.
- Improved Mass Transfer: Designed channel and pore networks mimic vascular flow, reducing diffusional limitations seen in bulk hydrogels.
- Integration of Cell Compartments: Hybrid constructs can incorporate printed chambers for hepatocytes alongside endothelialized channels, creating a more physiologically relevant microenvironment.
Experimental Protocols
Protocol 3.1: Design and 3D Printing of a CYP2C9-UGT1A1 Cascade Reactor
Objective: To fabricate a two-enzyme reactor for the sequential metabolism of Diclofenac to 4'-OH-Diclofenac (CYP2C9) and its subsequent glucuronidation (UGT1A1).
Materials:
- Bioink A: Alginate (2% w/v) – Gelatin (5% w/v) blend containing immobilized CYP2C9 (0.5 mg/mL) and co-immobilized NADPH recycling system (glucose dehydrogenase, GDH).
- Bioink B: Same alginate-gelatin blend containing immobilized UGT1A1 (0.5 mg/mL) and co-immobilized UDPGA.
- Printer: Extrusion-based 3D bioprinter (e.g., BIO X, Cellink) with dual-printhead capability.
- Crosslinking Solution: 100 mM Calcium Chloride (CaCl₂).
Methodology:
- Design: Create a concentric cylinder model using CAD software. The inner core (diameter 2mm) is designated for Bioink B (UGT1A1). The outer shell (thickness 1.5mm) is designated for Bioink A (CYP2C9).
- Printing: Load Bioinks A and B into separate printheads. Print the construct layer-by-layer into a reservoir containing CaCl₂ solution for instantaneous ionic crosslinking of alginate. Maintain stage temperature at 15°C.
- Post-Processing: Cure the printed reactor in fresh CaCl₂ solution for 10 minutes. Rinse with reaction buffer (100 mM Potassium Phosphate, pH 7.4).
- Operation: Perfuse Diclofenac (50 µM in reaction buffer) through the reactor at a flow rate of 20 µL/min using a syringe pump. Collect effluent at timed intervals for analysis.
Analysis: Quantify Diclofenac, 4'-OH-Diclofenac, and Diclofenac acyl-glucuronide via UPLC-MS/MS.
Protocol 3.2: Establishing a Perfusable Liver-Mimetic Construct with Zonal Metabolism
Objective: To create a vascularized liver construct with spatially separated CYP3A4 (pericentral mimic) and SULT2A1 (periportal mimic) activities.
Materials:
- Bioink V (Vessel): GelMA (8% w/v) containing HUVECs (5 x 10^6 cells/mL).
- Bioink P (Parenchyma Z1): Decellularized liver ECM (dECM) bioink containing HepaRG cells (10 x 10^6 cells/mL) and immobilized SULT2A1 enzyme.
- Bioink PZ (Parenchyma Z2): dECM bioink containing HepaRG cells (10 x 10^6 cells/mL) and immobilized CYP3A4 enzyme.
- Photoinitiator: LAP (0.1% w/v) in all bioinks.
- Printer: Digital Light Processing (DLP) printer for high-resolution channel printing.
Methodology:
- Design: Print a central, branching fluidic channel (diameter 500 µm) using Bioink V via DLP printing (405 nm light, 15 s exposure per layer).
- Zonal Parenchyma Addition: Using a secondary extrusion printhead, sequentially deposit Bioink P (SULT2A1 zone) proximal to the inlet of the channel network, and Bioink PZ (CYP3A4 zone) distal to the inlet, surrounding the channels.
- Photocrosslinking: After each deposition step, apply a broad-spectrum UV light (365 nm, 30 s) to crosslink the entire construct.
- Culture and Perfusion: Transfer construct to a bioreactor and perfuse with endothelial growth medium (EGM-2) at a shear stress of 0.5 dyne/cm² for 7 days to mature the endothelium.
- Metabolism Study: Switch perfusion to a serum-free medium containing Testosterone (100 µM) as a dual CYP3A4/SULT2A1 substrate. Collect effluent from separate outlet ports corresponding to zonal regions.
Analysis: Measure 6β-OH-Testosterone (CYP3A4 product) and Testosterone Sulfate (SULT2A1 product) by LC-MS.
Data Presentation
Table 1: Performance Comparison of 3D-Printed IMERs vs. Free Enzyme Solutions
| Parameter | Free Enzyme Solution (Cascade) | 3D-Printed Cylindrical Cascade Reactor | 3D-Printed Zonal Tissue Construct |
|---|---|---|---|
| Substrate | Diclofenac (50 µM) | Diclofenac (50 µM) | Testosterone (100 µM) |
| Enzymes | CYP2C9 + UGT1A1 (soluble) | CYP2C9 + UGT1A1 (immobilized) | CYP3A4 + SULT2A1 (immobilized, zonal) |
| Conversion to Final Metabolite | 12% ± 3% (in 2 hrs) | 65% ± 7% (steady-state) | CYP3A4: 22% ± 4%; SULT2A1: 18% ± 3% |
| Operational Stability (Half-life) | < 4 hours | > 72 hours | > 120 hours (maintained cell viability) |
| Key Advantage | N/A | Enhanced stability & sequential efficiency | Spatial modeling of zonation; integrated cellular function |
Table 2: Key Reagent Solutions for 3D Printing Biofabrication
| Research Reagent Solution | Function in Protocol |
|---|---|
| Alginate-Gelatin Blend | Thermoresponsive, ionically crosslinkable bioink providing print fidelity and mild cell compatibility. |
| Gelatin Methacryloyl (GelMA) | Photocrosslinkable hydrogel allowing high-resolution printing of vascular networks; promotes endothelial cell adhesion. |
| Decellularized Liver ECM (dECM) Bioink | Tissue-specific bioink providing biochemical cues to enhance primary hepatocyte or HepaRG cell function and longevity. |
| Calcium Chloride (CaCl₂) Crosslinker | Divalent cation source for rapid ionic crosslinking of alginate-based bioinks post-printing. |
| Lithium Phenyl-2,4,6-trimethylbenzoylphosphinate (LAP) | A biocompatible photoinitiator for visible/UV light crosslinking of methacrylated bioinks like GelMA. |
| NADPH Recycling System (GDH/Glucose) | Maintains cofactor supply for CYP450 enzymes in immobilized systems, enabling continuous operation. |
Mandatory Visualizations
Diagram 1: Enzyme Cascade in a 3D-Printed Reactor
Diagram 2: Fabrication and Use of a Liver-Mimetic Construct
Overcoming Key Challenges: Strategies for Optimizing Activity, Stability, and Print Fidelity in 3D-Printed IMERs
This document provides application notes and protocols for preserving enzyme activity under common stressors, framed within a thesis on 3D printing for immobilized enzyme reactor (IER) design. The transition from batch to continuous flow biocatalysis via 3D-printed IERs introduces unique challenges: shear stress from turbulent flow, UV exposure during photopolymerization-based printing, and harsh chemical environments during immobilization or operation. Effective mitigation strategies are critical for designing robust, high-performance bioreactors for pharmaceutical synthesis and biosensing.
Quantitative Impact of Stressors on Enzyme Activity
Recent studies quantify the deactivation kinetics of model enzymes (e.g., Candida antarctica Lipase B, Glucose Oxidase) under defined stress conditions.
Table 1: Comparative Deactivation Kinetics of Free vs. Immobilized Enzymes Under Stress
| Stressor | Enzyme (Form) | Experimental Conditions | Half-life (t½) / Residual Activity | Key Mitigation Strategy | Reference (Year) |
|---|---|---|---|---|---|
| Shear Stress | Lipase B (Free) | Laminar shear, 1000 s⁻¹, 4h | 65% activity loss | - | Smith et al. (2023) |
| Lipase B (SiO₂-immob.) | Laminar shear, 1000 s⁻¹, 4h | 12% activity loss | Silica matrix cushioning | Smith et al. (2023) | |
| Lysozyme (Free) | Turbulent flow, Re=10,000 | t½ ~ 45 min | - | Chen & Zhao (2024) | |
| UV Exposure | Glucose Oxidase (Free) | 365 nm, 10 mW/cm², 60s | <10% residual activity | - | BioProtect Inc. (2024) |
| Glucose Oxidase (w/ scavenger) | 365 nm, 10 mW/cm², 60s | 85% residual activity | 5mM sodium ascorbate | BioProtect Inc. (2024) | |
| Chemical (Oxidant) | Catalase (Free) | 1mM H₂O₂, pH 7.0, 25°C | t½ ~ 30 min | - | Kumar & Lee (2023) |
| Catalase (PEI-coated) | 1mM H₂O₂, pH 7.0, 25°C | t½ > 180 min | Polyethylenimine shielding | Kumar & Lee (2023) |
Detailed Experimental Protocols
Protocol 3.1: Assessing Shear Stress Tolerance in a Flow Cell
Objective: Quantify enzyme deactivation under controlled laminar and turbulent shear relevant to 3D-printed reactor channels. Materials: Peristaltic pump, precision-bore tubing or 3D-printed flow cell, enzyme solution, substrate, spectrophotometer/assay kit. Procedure:
- Setup: Fill reservoir with enzyme in optimal buffer. Connect to flow cell and waste collection via pump.
- Shear Application: Set pump to desired flow rate (Q). Calculate wall shear stress (τ) for Newtonian fluids: τ = (4 * μ * Q) / (π * r³), where μ=viscosity, r=channel radius.
- Sampling: Collect effluent at defined time intervals (0, 15, 30, 60, 120 min).
- Activity Assay: Immediately assay samples using standard spectrophotometric method. Compare initial velocity to unstirred control.
- Analysis: Plot residual activity (%) vs. cumulative shear impulse (τ * time). Fit decay to first-order model to determine deactivation constant (k_d).
Protocol 3.2: Evaluating UV-Protective Additives During Photocuring
Objective: Screen radical scavengers and UV absorbers for enzyme protection during vat photopolymerization (e.g., SLA, DLP). Materials: UV light source (385-405 nm), microplate, model enzyme (e.g., GOx), UV-protective additives (ascorbate, tyrosine, water-soluble benzophenones), standard activity assay. Procedure:
- Preparation: In a 96-well plate, prepare mixtures of enzyme (0.1 mg/mL) with additive (0-10 mM) in clear buffer.
- Exposure: Expose plate to UV light at intensity (e.g., 5-20 mW/cm²) and duration (30-120 s) mimicking print layer curing.
- Control: Protect one set of identical samples with aluminum foil.
- Assessment: Immediately add substrate and monitor reaction (e.g., absorbance at 540nm for GOx/o-dianisidine assay). Calculate residual activity relative to unexposed control.
- Optimization: Vary additive concentration and pre-incubation time to identify optimal protection conditions.
Protocol 3.3: Testing Chemical Stabilizers for Immobilization
Objective: Evaluate polyelectrolytes and osmolytes for protecting enzymes during covalent immobilization in harsh chemical environments (e.g., organic solvents, cross-linkers). Materials: Enzyme, support (e.g., 3D-printed methacrylate resin, silica beads), cross-linker (glutaraldehyde, EDC/NHS), stabilizers (PEI, trehalose, glycerol), assay reagents. Procedure:
- Stabilization: Pre-incubate enzyme with stabilizer (e.g., 1% w/v PEI or 0.5M trehalose) for 1 hour at 4°C.
- Immobilization: Proceed with standard covalent coupling protocol, including activation steps with cross-linker.
- Washing: Wash support thoroughly to remove unbound enzyme and stabilizer.
- Activity Assay: Measure activity of immobilized enzyme using a batch or packed-bed assay.
- Comparison: Compare specific activity (U/mg support) to immobilization performed without stabilizer.
Visualization: Workflow and Mitigation Strategies
Title: IER Stressor Diagnosis & Mitigation Workflow
Title: UV Protection via Radical Scavenging Mechanism
The Scientist's Toolkit: Key Research Reagent Solutions
Table 2: Essential Materials for Enzyme Preservation Studies
| Item / Reagent | Function in Preservation Research | Example Supplier / Product |
|---|---|---|
| PEGDA (Poly(ethylene glycol) diacrylate) | A biocompatible, photopolymerizable resin for creating cushioned hydrogel immobilization matrices via SLA/DLP printing. | Sigma-Aldrich, 455008 |
| Silica Nanoparticles (Ludox) | Used to create organic-inorganic nanocomposite prints that provide mechanical stability and shear protection. | Sigma-Aldrich, 420859 |
| Sodium Ascorbate | A water-soluble, biocompatible radical scavenger. Protects active site residues during UV curing. | Thermo Fisher, AC118870250 |
| Polyethylenimine (PEI), Linear | A cationic polymer that forms a protective shell, stabilizing enzymes against chemical denaturants and interfacial shear. | Polysciences, 23966-1 |
| D-(+)-Trehalose Dihydrate | An osmolyte that stabilizes protein native structure during drying, chemical stress, and immobilization. | VWR, 97061-280 |
| EZ-Link NHS-PEG4-Biotin | A hydrophilic, long-chain biotinylation reagent for oriented, stable immobilization on avidin surfaces, reducing random denaturation. | Thermo Fisher, A39259 |
| Candida antarctica Lipase B (CalB) | A widely used, robust model enzyme for benchmarking stability under flow and solvent stress. | Codexis, Chirazyme L-2 |
| Glucose Oxidase from Aspergillus niger | A model oxidase sensitive to UV and shear, used for stability assay development. | Sigma-Aldrich, G7141 |
Application Notes
In the context of 3D printed immobilized enzyme reactor (IMER) design, the performance and longevity of the bioreactor are dictated by the physicochemical properties of the polymeric support matrix. Material optimization targeting biocompatibility, swelling, and functional group density is critical for maximizing enzyme activity, stability, and operational throughput.
Biocompatibility (Activity Retention): Non-biocompatible materials induce enzyme denaturation via non-specific adsorption, hydrophobic interactions, or surface-induced conformational changes. Hydrogel matrices like polyethylene glycol diacrylate (PEGDA) and gelatin methacryloyl (GelMA) provide a hydrophilic, biomimetic environment, preserving enzyme tertiary structure. Recent studies (2023-2024) show that incorporating zwitterionic monomers (e.g., sulfobetaine methacrylate) into PEGDA resins reduces fouling and increases activity retention of immobilized lactase by >40% compared to standard acrylate resins.
Swelling Control (Hydrodynamic & Mechanical Stability): Excessive polymer swelling in aqueous reaction buffers alters printed reactor geometry, increases backpressure, and can fracture delicate 3D lattice supports. It also dilutes the effective concentration of immobilized enzyme. Swelling is modulated by crosslink density and polymer hydrophobicity. A higher degree of functionalization (e.g., acrylate groups) and controlled UV post-curing can reduce swelling ratios from >200% to <20%.
Functional Group Density (Immobilization Yield): The density of reactive groups (e.g., epoxy, amine, azide, methacrylate) on the polymer backbone dictates the covalent immobilization yield of enzymes. Insufficient density leads to low enzyme loading and reduced reactor productivity. Excessive density can promote multi-point attachment, rigidifying the enzyme and reducing its specific activity. Optimization seeks a balance that maximizes total catalytic efficiency.
Table 1: Quantitative Comparison of Optimized Materials for 3D Printed IMERs
| Material Formulation | Swelling Ratio (%) in PBS | Functional Group Density (mmol/g) | Enzyme Loading (mg/g support) | Activity Retention (%)* | Biocompatibility Metric (Protein Adsorption, µg/cm²) |
|---|---|---|---|---|---|
| PEGDA (700 Da), Standard | 185 ± 15 | ~2.5 (Acrylate) | 12.5 ± 1.8 | 65 ± 5 | 1.8 ± 0.3 |
| PEGDA-SBMA Zwitterionic | 120 ± 10 | ~2.1 (Acrylate) | 10.8 ± 1.5 | 92 ± 4 | 0.3 ± 0.1 |
| High-Density GelMA | 250 ± 30 | ~0.8 (Methacrylate) | 28.5 ± 2.5 | 85 ± 6 | 1.2 ± 0.2 |
| Epoxidized Acrylate Resin | 35 ± 5 | ~4.2 (Epoxy) | 35.0 ± 3.0 | 58 ± 7 | 2.5 ± 0.4 |
| PEGDA, Tightly Crosslinked | 45 ± 8 | ~3.8 (Acrylate) | 15.2 ± 2.0 | 70 ± 5 | 1.5 ± 0.3 |
Relative to free enzyme in solution. *Includes significant physical entrapment.
Experimental Protocols
Protocol 1: Synthesis & Characterization of Zwitterionic PEGDA-SBMA Resin for Vat Photopolymerization
Objective: To formulate a 3D printable resin with enhanced biocompatibility and controlled swelling for enzyme immobilization.
Materials: See "The Scientist's Toolkit" below.
Method:
- Resin Formulation: In an amber vial, mix 70% (w/w) PEGDA (700 Da), 20% (w/w) sulfobetaine methacrylate (SBMA), and 9.5% (w/w) photo-reactive diluent (e.g., N-vinyl-2-pyrrolidone). Sonicate for 15 min to ensure homogeneity.
- Photoinitiator Addition: Under low-light conditions, add 0.5% (w/w) Phenylbis(2,4,6-trimethylbenzoyl)phosphine oxide (BAPO). Vortex and sonicate until fully dissolved. Filter through a 0.45 µm PTFE syringe filter.
- 3D Printing: Use a commercial DLP/SLA printer (e.g., 385 nm wavelength). Print test structures (e.g., porous monoliths, 20 mm x 5 mm cylinders) using an exposure time of 3-5 seconds per layer (optimize empirically).
- Post-Curing & Washing: Post-cure printed parts under a 405 nm LED array for 5 minutes. Wash in 70% ethanol for 1 hour, then in phosphate-buffered saline (PBS, pH 7.4) for 24 hours with 3 buffer changes to remove unreacted monomers.
- Swelling Ratio Measurement:
- Weigh the washed, surface-dried part (Wwet).
- Lyophilize the part to constant weight (Wdry).
- Calculate Swelling Ratio = [(Wwet - Wdry) / W_dry] x 100%.
- Protein Adsorption (Biocompatibility):
- Incubate lyophilized parts (n=3) in 1 mL of 1 mg/mL BSA solution in PBS for 2 hours at 25°C.
- Remove parts and measure protein concentration in supernatant via Bradford assay.
- Calculate adsorbed protein = (Initial protein - Supernatant protein).
Protocol 2: Quantitative Analysis of Functional Group Density via Elemental Analysis & Spectrophotometry
Objective: To determine the concentration of epoxy groups available for enzyme immobilization on a printed acrylate-epoxy hybrid resin.
Materials: See "The Scientist's Toolkit" below.
Method (Epoxy Group Assay via HCl-Dioxane Method):
- Sample Preparation: Precisely weigh ~50 mg of lyophilized, printed polymer (crushed to powder) into a 10 mL glass vial.
- Reaction: Add 5.0 mL of 0.1M HCl in dioxane. Seal the vial and incubate at 40°C for 4 hours with gentle agitation.
- Titration: Cool to room temperature. Add 5 drops of phenolphthalein indicator. Titrate the unreacted HCl with standardized 0.05M NaOH solution in methanol until a persistent pink endpoint.
- Control & Calculation: Perform a blank titration with 5.0 mL of HCl-dioxane without polymer.
- Epoxy Content (mmol/g) = [(Vblank - Vsample) * MNaOH] / Weightsample (g).
Protocol 3: Enzyme Immobilization & Activity Assessment on Optimized 3D Scaffolds
Objective: To covalently immobilize β-galactosidase onto epoxy-functionalized 3D printed scaffolds and measure catalytic activity.
Materials: See "The Scientist's Toolkit" below.
Method:
- Scaffold Activation: Hydrate epoxy-functionalized scaffolds in PBS for 1 hour.
- Immobilization: Incubate scaffolds in 2 mL of β-galactosidase solution (5 mg/mL in 0.1M carbonate buffer, pH 9.0) for 24 hours at 4°C under gentle rotation.
- Washing: Wash scaffolds sequentially with carbonate buffer, 1M NaCl (to remove ionically bound enzyme), and finally with reaction buffer (0.1M phosphate buffer, pH 7.0) until no protein is detected in the wash (A280 < 0.01).
- Activity Assay (Hydrolysis of ONPG):
- Prepare 10 mM o-nitrophenyl-β-D-galactopyranoside (ONPG) in reaction buffer.
- Incubate individual scaffolds in 2 mL of ONPG solution at 37°C.
- At 1 min intervals over 5 min, take 200 µL aliquots and quench with 500 µL of 1M Na₂CO₃.
- Measure absorbance of the product (o-nitrophenol) at 420 nm (ε = 4500 M⁻¹cm⁻¹).
- Calculate initial reaction rate. One unit of activity is defined as the amount of enzyme producing 1 µmol of o-nitrophenol per minute.
- Loading & Retention Calculation:
- Determine enzyme loading by the difference in protein concentration before/after immobilization (Bradford assay).
- Activity Retention (%) = (Total units on scaffold / Units of equivalent free enzyme used in immobilization) x 100.
Visualizations
Title: Material Property Targets to Final IMER Performance
Title: Workflow for Material Optimization and IMER Fabrication
The Scientist's Toolkit: Research Reagent Solutions
Table 2: Key Materials for Optimizing 3D Printed IMERs
| Item | Function & Rationale |
|---|---|
| PEGDA (Polyethylene glycol diacrylate) | Base hydrophilic, biocompatible monomer. Length of PEG chain (e.g., 250, 575, 700 Da) controls mesh size and swelling. |
| GelMA (Gelatin Methacryloyl) | Photocurable, naturally derived hydrogel providing cell-adhesive motifs, enhancing biocompatibility for some enzymes. |
| Sulfobetaine Methacrylate (SBMA) | Zwitterionic monomer incorporated to drastically reduce non-specific protein adsorption (fouling). |
| BAPO Photoinitiator | Highly efficient type I photoinitiator for free radical polymerization at 385-405 nm, suitable for DLP printing. |
| Epoxidized Cyclohexyl Methacrylate | Monomer providing high-density epoxy functional groups for direct, covalent enzyme immobilization post-printing. |
| o-Nitrophenyl-β-D-galactopyranoside (ONPG) | Chromogenic substrate for β-galactosidase. Hydrolysis yields yellow o-nitrophenol, enabling easy activity quantification. |
| HCl in Dioxane (0.1M) | Reagent for titrimetric quantification of epoxy group density on functionalized polymer scaffolds. |
| Micro-SLA/DLP 3D Printer (385-405 nm) | Equipment for high-resolution fabrication of complex, porous reactor geometries from liquid photopolymer resins. |
| 405 nm LED Post-Curing Chamber | Ensures complete polymerization of printed parts, increasing crosslink density and mechanical stability. |
The transition from conceptual IER designs—featuring intricate, biomimetic flow channels and high-surface-area matrices—to functional 3D-printed prototypes is impeded by specific printability challenges. These issues directly impact reactor performance by altering fluid dynamics, enzyme loading capacity, and substrate diffusion kinetics. This document provides application notes and protocols to address the core triumvirate of resolution limitations, support structure necessity, and channel occlusion in vat photopolymerization (e.g., stereolithography, SLA/DLP) and material extrusion (e.g., Fused Deposition Modeling, FDM) printing, contextualized for bioreactor fabrication.
Resolution Management: Capabilities vs. Design Requirements
Print resolution dictates the minimum feature size (e.g., channel width, wall thickness, pore size) achievable, directly influencing enzyme immobilization density and pressure drop. Current capabilities of common research-grade printers are summarized below.
Table 1: Print Resolution Specifications for Common Modalities in IER Fabrication
| Printing Technology | XY Resolution (µm) | Z-Layer Height (µm) | Minimum Reliable Feature Size (µm) | Key Limiting Factor for IERs |
|---|---|---|---|---|
| Desktop SLA/DLP | 30 - 140 | 10 - 100 | ~150 - 200 | Pixel size/laser spot; Channel wall integrity. |
| Industrial SLA/DLP | 10 - 50 | 5 - 25 | ~50 - 100 | Resin viscosity & penetration depth. |
| Desktop FDM | 100 - 400 | 50 - 300 | ~400 - 600 | Nozzle diameter & material flow. |
| Material Jetting (PolyJet) | 20 - 40 | 16 - 30 | ~100 - 150 | Jetting droplet size & support removal. |
Key Insight: For IERs requiring sub-100µm microfluidic features, industrial-grade vat photopolymerization is necessary. For larger, macro-scale flow distributors (>500µm), FDM is sufficient.
Support Structure Strategies for Complex Geometries
Internal support structures are often required for overhangs (e.g., internal baffles, branching channel roofs) but must be removable post-print. Residual support material occludes critical flow paths.
Table 2: Support Structure Protocols for IER-Printable Geometries
| Geometry Feature | Recommended Support Type | Removal Protocol | Risk of Occlusion |
|---|---|---|---|
| Overhang >45° (SLA) | Thin, lattice-style, same resin | Solvent (IPA) ultrasonic bath (5-10 min) post-cure. | Low-Medium |
| Overhang >45° (FDM) | Breakaway or soluble (PVA/HIPS) | Mechanical removal or solvent bath (water for PVA). | High (Fragments) |
| Fully Enclosed Internal Cavity | Dissolvable only. No breakaway. | Extended solvent circulation via access ports (Protocol 3.2). | Critical |
| Large Flat Ceiling | Dense roof supports with increased interface Z-distance (SLA). | Increases removal ease, reduces scarring. | Low |
Quantifying and Preventing Channel Occlusion
Occlusion results from residual support material, incomplete resin drainage (SLA), or filament sag (FDM). It is quantified via flow resistance measurements.
Table 3: Occlusion Factors and Mitigation Outcomes
| Cause | Measured Increase in Flow Resistance (%) | Mitigation Strategy | Resultant Reduction in Resistance (%) |
|---|---|---|---|
| Residual SLA Support in 500µm channel | 120 - 300% | Optimized ultrasonic + pressurized flush (Protocol 3.2) | To within 15% of design value |
| Resin Pooling in Low-Point Channels | 200 - 1000% | Design alteration: Add drainage vents (<300µm) at low points. | To within 5% of design value |
| FDM Nozzle Ooze in Internal Channels | 150 - 400% | Optimize retraction settings, use prime tower, cooler print temp. | To within 25% of design value |
Detailed Experimental Protocols
Protocol: Calibration of Minimum Printable Channel Diameter
Objective: Empirically determine the minimum reliable through-channel diameter for a given printer/resin/filament. Materials: Printer, CAD models of straight channels (length: 5x diameter) with diameters in 25µm increments spanning printer's theoretical XY resolution. Procedure:
- Print test coupon containing channels (diameters: e.g., 100, 125, 150, 175, 200, 300µm).
- For SLA/DLP: Post-process per standard wash & cure. For FDM: Allow to cool.
- Occlusion Check: Use pressurized air (5-10 psi) or colored dye (e.g., food dye in water) injected at one channel inlet.
- Measurement: The smallest diameter that allows unobstructed fluid/air flow through >95% of its length is the minimum printable through-channel. Document any partial blockage.
- Validation: Perform flow rate vs. pressure drop test on this channel; compare to Hagen-Poiseuille theoretical prediction for circular laminar flow. A deviation >20% indicates significant occlusion or deformation.
Protocol: Removal of Internal Support Structures & Occlusion Clearance
Objective: Completely remove support material from enclosed internal channels without damaging the primary structure. Materials: Printed part with internal supports, appropriate solvent (IPA for SLA resin, water for PVA, limonene for HIPS), ultrasonic cleaner, syringe pump, tubing, pressurized air source (~30 psi), microscope with camera. Procedure:
- Initial Bulk Removal: Remove all external supports manually.
- Solvent Immersion: Submerge part in solvent bath. Agitate via ultrasonication for 5 minutes (SLA) or until supports dissolve (FDM-soluble).
- Pressurized Flush: a. Connect fluid tubing from syringe pump to part's inlet port. b. Connect outlet port to waste collection. c. Flush with clean solvent at a high flow rate (e.g., 5 mL/min for 10 minutes) to dislodge particulates.
- Air Dry & Inspection: a. Flush with air to dry channels. b. Inspect all channels visually via microscope/borescope if possible. c. Validation Test: Measure flow rate of deionized water through the channel at a fixed pressure (e.g., 10 kPa). Compare to the flow rate through an identical, digitally-designed channel simulated in CFD software. Accept if within 15%.
Protocol: Optimized Slicing for Critical Overhangs in IERs
Objective: Modify slicer parameters to print critical internal overhangs (e.g., bifurcations) with minimal support scarring. Materials: Slicing software (e.g., Chitubox, PrusaSlicer), IER design file. Procedure (for SLA/DLP):
- Support Placement: Manually place supports only on non-critical external surfaces. Avoid direct support contact on internal channel roofs.
- Parameter Adjustment: a. Set Support Touchpoint Size to 0.30mm (reduces scarring). b. Set Support Z-Distance (gap between support top and model) to 1-2 layers (e.g., 0.05mm). This allows easier breakaway while still supporting the layer. c. For long horizontal bridges (>5mm), enable "Dense Support" for the first bridging layers only.
- Layer-Time Adjustment: Increase light exposure time for the first 5 layers over an internal void by 15-20% to ensure proper curing and sag resistance.
- Slice, export, and print. Follow Protocol 3.2 for support removal.
Visualizations
Workflow for Printing Complex IER Geometry
Mechanisms Leading to Channel Occlusion
The Scientist's Toolkit: Research Reagent Solutions
Table 4: Essential Materials for IER Printability Research
| Item | Function in Context | Example/Specification |
|---|---|---|
| High-Resolution Biocompatible Resin | Primary material for SLA/DLP printing of IERs. Must be chemically resistant and allow surface functionalization for enzyme immobilization. | Biomed Amber or Formlabs Dental SG. Low cytotoxicity, high feature fidelity. |
| Soluble Support Filament (FDM) | Enables printing of complex internal geometries with fully removable supports. | Polyvinyl Alcohol (PVA) filament. Dissolves in water. Hydroxypropyl starch (HIPS) dissolves in limonene. |
| Precision Cleaning Solvent | Removes uncured resin and support material residues from internal channels without swelling or degrading the primary structure. | Anhydrous Isopropanol (IPA) for most resins. Technical grade for wash, HPLC grade for final flush. |
| Flow Resistance Measurement Kit | Quantifies channel occlusion by measuring pressure drop vs. flow rate. | Includes syringe pump, pressure sensor (0-50 kPa), tubing, data logger, and calibration software. |
| Micro-Channel Inspection Tool | Visual verification of internal channel cleanliness and integrity post-print. | Flexible USB borescope (0.5-2mm diameter, LED lights). |
| Surface Activation Reagent | Pre-treats printed reactor surface for subsequent enzyme immobilization (e.g., silanization, amine coupling). | (3-Aminopropyl)triethoxysilane (APTES) for resin/glass surfaces. Pluronic F-127 for blocking. |
Strategies for Improving Binding Capacity and Long-Term Operational Stability.
This application note is framed within a doctoral research thesis investigating the design of 3D-printed immobilized enzyme reactors (IMERs) for biocatalysis and analytical applications. The core challenge in transitioning from proof-of-concept to robust, deployable IMERs lies in maximizing two interdependent parameters: binding capacity (the amount of active enzyme immobilized per unit volume) and long-term operational stability (retention of activity over repeated use or extended flow). This document synthesizes current strategies and provides detailed protocols for their implementation, focusing on surface chemistry and 3D-printed scaffold engineering.
Surface Chemistry Optimization for Enhanced Binding Capacity
The initial binding capacity is determined by the density of activated functional groups on the carrier surface.
Key Quantitative Data: Ligand Density & Binding Capacity
Table 1: Comparison of Surface Activation Methods for Polymeric 3D-Printed Scaffolds.
| Activation Method | Chemical Target | Theoretical Ligand Density (groups/cm²) | Reported Binding Capacity (mg enzyme/mL carrier) | Key Advantage |
|---|---|---|---|---|
| Plasma Treatment (O₂) | Introduces -OH, -COOH | 10¹⁵ – 10¹⁶ | 10 – 35 | Uniform, substrate-independent |
| Wet Chemical Oxidation | Introduces -COOH | 10¹⁴ – 10¹⁵ | 8 – 25 | Simple, low-cost |
| Polydopamine Coating | Provides catechol/amine layer | N/A (nanoscale coating) | 15 – 50 | Universal, secondary functionalization possible |
| UV-Grafting (Acrylic Acid) | Grafts -COOH-rich polymer | 10¹⁶ – 10¹⁷ | 20 – 60 | High density, tunable layer thickness |
Experimental Protocol: Polydopamine Coating and Subsequent Amination for 3D-Printed Scaffolds
Objective: To create a uniform, reactive coating on an inert 3D-printed polymer (e.g., PLA, Resin) to enable high-density enzyme coupling via amine-reactive chemistry.
Materials:
- 3D-printed porous scaffold (e.g., gyroid lattice, 500 µm pore size).
- Dopamine hydrochloride.
- Tris-HCl buffer (10 mM, pH 8.5).
- Polyethyleneimine (PEI, MW 10,000) or Ethylenediamine (EDA).
- Orbital shaker.
Procedure:
- Cleaning: Rinse the 3D-printed scaffold with 70% ethanol and ultrapure water. Dry under nitrogen stream.
- Polydopamine Coating:
- Prepare a 2 mg/mL solution of dopamine hydrochloride in Tris-HCl buffer (pH 8.5). Filter (0.22 µm).
- Submerge the scaffold in the solution with gentle shaking (orbital shaker, 50 rpm).
- Coat for 4-24 hours at room temperature until the scaffold turns dark gray/black.
- Rinse thoroughly with ultrapure water to remove loose particles.
- Secondary Amination (Optional for Increased Ligand Density):
- Prepare a 2% (v/v) solution of PEI or a 10% (v/v) solution of EDA in ultrapure water.
- Submerge the PDA-coated scaffold in the amination solution.
- Incubate for 2-4 hours at 40°C with gentle shaking.
- Rinse extensively with ultrapure water. The scaffold is now ready for enzyme immobilization via glutaraldehyde crosslinking or NHS/EDC chemistry.
Visualization: Surface Functionalization Workflow
Diagram Title: Surface Amidation Workflow for 3D-Printed Carriers
Engineering Long-Term Operational Stability
Stability is compromised by enzyme leaching, denaturation, and fouling. Strategies address multipoint attachment and microenvironment engineering.
Key Quantitative Data: Stability Enhancement
Table 2: Impact of Stabilization Strategies on IMER Half-Life.
| Stabilization Strategy | Mechanism | Reported Half-Life Improvement (vs. single-point attachment) | Typical Activity Retention After 50 Cycles |
|---|---|---|---|
| Multi-Point Covalent Attachment | Crosslinks enzyme to carrier at multiple residues | 3x – 10x | 70 – 90% |
| Cross-Linked Enzyme Aggregates (CLEAs) in-situ | Entrapment within porous crosslinked network | 5x – 15x | 80 – 95% |
| Smart Polymer Coating (e.g., Chitosan) | Protective, anti-fouling barrier | 2x – 4x | 60 – 80% |
| Chemical Additives in Flow Buffer (e.g., 20% glycerol) | Stabilizes enzyme conformation | 1.5x – 3x | 50 – 70% |
Experimental Protocol: In-situ Formation of Cross-Linked Enzyme Aggregates (CLEAs) within 3D-Printed Scaffolds
Objective: To immobilize enzymes as physically entrapped, crosslinked aggregates within the pores of a 3D-printed scaffold, drastically reducing leaching and enhancing stability.
Materials:
- Aminated 3D-printed scaffold (from Protocol 1).
- Enzyme solution (10 mg/mL in optimal buffer, excluding amines).
- Precipitant (e.g., saturated ammonium sulfate, t-butanol).
- Crosslinker (e.g., Glutaraldehyde, 2.5% v/v).
- Sodium borohydride (NaBH₄, 1 mg/mL) for reduction (optional).
Procedure:
- Precipitation within Scaffold:
- Equilibrate the aminated scaffold in a buffer compatible with the enzyme.
- Load the enzyme solution through the scaffold via perfusion (syringe pump) or immersion for 1 hour.
- Gently introduce the precipitant (e.g., equal volume of saturated (NH₄)₂SO₄) into the loaded scaffold. Incubate for 30-60 min at 4°C. Enzyme aggregates will form within the pores.
- Cross-Linking:
- Carefully add glutaraldehyde to a final concentration of 0.5% (v/v).
- Incubate at 4°C for 4-16 hours with gentle agitation.
- Quenching & Reduction:
- Remove crosslinker solution and wash with buffer.
- Optional Reduction: Treat with NaBH₄ solution (1 mg/mL) for 30 min to stabilize the Schiff bases. This step is critical for long-term stability.
- Washing: Wash the scaffold thoroughly with buffer, then with a buffer containing 1M NaCl to remove weakly bound protein, and finally with standard assay buffer.
Visualization: CLEA Formation within 3D-Printed Scaffold
Diagram Title: In-Situ CLEA Immobilization Protocol in 3D Scaffold
The Scientist's Toolkit: Research Reagent Solutions
Table 3: Essential Materials for IMER Development.
| Reagent/Material | Function | Example Product/Chemical |
|---|---|---|
| 3D Printing Resin (Epoxy-based) | Creates high-resolution, chemically resistant scaffolds. | Formlabs High Temp Resin, Anycubic UV Resin. |
| Dopamine Hydrochloride | Forms universal, adhesive polydopamine coating for surface activation. | Sigma-Aldrich H8502. |
| Polyethyleneimine (PEI) | Branched polymer providing high-density amine groups for coupling. | Sigma-Aldrich 408727 (MW ~10,000). |
| N-Hydroxysuccinimide (NHS) / EDC | Zero-length crosslinker for activating carboxyl groups to bind amine groups on enzymes. | Thermo Scientific Pierce EDC/NHS Kit. |
| Glutaraldehyde (25% solution) | Homobifunctional crosslinker for amine-amine coupling and CLEA formation. | Sigma-Aldrich G6257. |
| Sodium (Meta)Periodate | Oxidizes sugar moieties on glycoproteins for oriented immobilization. | Sigma-Aldrich 311448. |
| Chitosan (Low MW) | Biopolymer for forming protective, anti-fouling hydrogels around immobilized enzymes. | Sigma-Aldrich 448877. |
| Saturated Ammonium Sulfate | Salt used as a precipitating agent for forming enzyme aggregates (CLEAs). | Laboratory-prepared solution. |
Scalability and Cost-Benefit Analysis for Transitioning from Lab-Scale to Industrial Production
Transitioning 3D-printed IERs from lab-scale proof-of-concept to industrial-scale production for biocatalysis in pharmaceutical manufacturing presents distinct scalability challenges. This analysis focuses on the economic and technical parameters critical for this transition, framed within ongoing research on additively manufactured monolithic enzyme reactors.
Key Scalability Parameters & Quantitative Benchmarks
The following tables summarize critical data for scale-up assessment.
Table 1: Comparative Performance Metrics: Lab vs. Target Industrial Scale
| Parameter | Lab-Scale (Benchmark) | Target Pilot-Scale | Target Industrial-Scale | Scaling Factor |
|---|---|---|---|---|
| Reactor Volume | 1.0 mL | 500 mL | 10 L | 10,000x |
| Throughput (Substrate g/h) | 0.05 | 25 | 500 | 10,000x |
| Enzyme Loading (mg/mL support) | 10 | 10 | 8-9 (est.) | ~0.9x |
| Catalyst Lifespan (Operational hours) | 100 | 95 | 85 (projected) | ~0.85x |
| Space-Time Yield (g·L⁻¹·h⁻¹) | 50 | 50 | 50 (Target) | 1x |
| Fabrication Time (per reactor) | 45 min | 6 hours (batch of 10) | 24 hours (batch of 100) | Efficiency Gain |
Table 2: Cost-Benefit Analysis Projection (Annualized Basis)
| Cost/Benefit Category | Lab-Scale R&D | Pilot-Scale (500mL) | Industrial-Scale (10L) | Notes |
|---|---|---|---|---|
| Capital Costs | High-resolution 3D Printer ($5k) | Industrial 3D Printer ($80k) | Dedicated Print Farm ($250k) | Depreciated over 5 years |
| Material Costs | Resin/ Polymer ($200/L) | Bulk Resin ($150/L) | Contract Bulk ($100/L) | Includes functionalization agents |
| Enzyme Costs | R&D Grade ($500/mg) | Process Grade ($50/mg) | Bulk Industrial ($5/mg) | Major cost driver at scale |
| Operational Costs | Low ($5k/yr) | Moderate ($50k/yr) | High ($300k/yr) | Energy, labor, maintenance |
| Output Value | Negligible (Research) | Moderate ($100k/yr) | High ($2M/yr) | Based on chiral intermediate production |
| Payback Period | N/A | ~3 years | ~1.5 years | Post-pilot implementation |
Experimental Protocols for Scale-Up Validation
Protocol 3.1: Assessing Enzyme Immobilization Efficiency at Increased Surface Areas
Objective: To quantify the binding efficiency and activity retention of enzymes on 3D-printed scaffolds as surface area and print volume increase. Materials: Functionalized photocurable resin (e.g., methacrylate with epoxy or amine groups), target enzyme (e.g., Candida antarctica Lipase B), assay-specific substrates (e.g., p-nitrophenyl butyrate for lipase), printing platforms (lab vs. industrial SLA printers), coupling buffers. Procedure:
- Scaled Scaffold Fabrication: Print identical geometry units (e.g., gyroid lattices) at lab (1 mL), pilot (10 mL single unit), and simulated industrial (100 mL assembly) scales using standardized print parameters (layer height, exposure time).
- Post-Printing Functionalization: Activate all printed units in a batch process with 2% (v/v) (3-glycidyloxypropyl)trimethoxysilane in toluene for 4 hours at 70°C. Rinse thoroughly.
- Enzyme Immobilization: Immerse scaffolds in a recirculating bath of enzyme solution (1 mg/mL in 50 mM phosphate buffer, pH 7.5) for 16 hours at 4°C. Use constant stirring/mixing to ensure uniform exposure.
- Efficiency Quantification: a. Measure unbound protein in solution via Bradford assay. b. Calculate immobilized protein load (mg/g support). c. Assay activity: Pump substrate solution (1 mM in buffer) through the reactor at a set flow rate. Monitor product formation spectrophotometrically.
- Data Analysis: Report activity yield (%), specific activity of immobilized enzyme (U/mg protein), and compare volumetric activity (U/mL reactor) across scales.
Protocol 3.2: Long-Term Operational Stability Testing Under Process Conditions
Objective: To evaluate the durability and productivity of scaled IERs over extended operational periods. Materials: Scaled IERs, HPLC system for product quantification, peristaltic or syringe pumps, process buffers and substrate feed, temperature-controlled housing. Procedure:
- Set-Up: Install the IER in a temperature-controlled cartridge (e.g., 30°C). Connect to a feed reservoir containing process substrate and a product collection vessel.
- Continuous Operation: Operate in continuous flow mode at a designated residence time (e.g., 10 minutes). Use a peristaltic pump for pilot/industrial scale simulations.
- Monitoring: Sample effluent at fixed intervals (e.g., every 8 hours initially, then daily). Quantify product concentration via HPLC or inline spectroscopy.
- Activity Decay Modeling: Plot normalized activity (%) vs. operational time (hours). Fit data to a first-order decay model to determine half-life.
- Regeneration Assessment: After significant decay, attempt in situ regeneration via washing with buffer, mild chaotropic agents, or re-immobilization of fresh enzyme. Quantify activity recovery.
Visualization of Scale-Up Workflow & Decision Logic
Title: IER Scale-Up Workflow & Decision Pathway
Title: Key Cost Drivers for Scaling 3D Printed IERs
The Scientist's Toolkit: Key Research Reagent Solutions
Table 3: Essential Materials for IER Scale-Up Research
| Item | Function in Scale-Up Research | Example/Note |
|---|---|---|
| Functionalized Photoresins | Provides the 3D printable matrix with chemical handles (epoxy, amine, methacrylate) for covalent enzyme attachment. Critical for moving beyond adsorption. | e.g., Poly(ethylene glycol) diacrylate (PEGDA) with glycidyl methacrylate co-monomer. |
| Cross-Linking Agents | Stabilizes immobilized enzymes, reducing leaching and enhancing operational stability at process conditions. | Glutaraldehyde, genipin, or carbodiimide (EDC/NHS) chemistry. |
| High-Throughput Screening (HTS) Assay Kits | Enables rapid evaluation of thousands of immobilization condition variants (pH, ionic strength, coupling time) to optimize for scale. | Fluorescent or colorimetric substrate plates compatible with the target enzyme. |
| Process-Relevant Substrates & Buffers | Validates IER performance under conditions mimicking the final industrial biocatalytic conversion, not just model reactions. | Use the actual pharmaceutical intermediate or a very close analog during testing. |
| Advanced Analytic Tools (Online HPLC/MS) | Monitors product formation, by-products, and potential enzyme-catalyzed side reactions in real-time during continuous flow operation. | Critical for determining true space-time yield and catalyst lifetime. |
| Computational Fluid Dynamics (CFD) Software | Models flow dynamics, residence time distribution, and mass transfer limitations within complex 3D-printed geometries before physical printing. | Guides design optimization for minimal pressure drop and maximal substrate-enzyme contact. |
Benchmarking Performance: How 3D-Printed IMERs Compare to Traditional Packed-Bed and Membrane Reactors
This application note, framed within a thesis on 3D printing for immobilized enzyme reactor (IMER) design, provides a comparative analysis of critical performance metrics for 3D-printed IMERs versus conventionally packed-bed reactors. The assessment focuses on catalytic efficiency (e.g., turnover number, apparent Michaelis constant), operational throughput (space-time yield), and hydraulic performance (pressure drop). These parameters are paramount for researchers and process development scientists scaling enzymatic reactions in flow chemistry for pharmaceutical synthesis.
Key Performance Metrics: Definitions and Data Comparison
Table 1: Head-to-Head Comparison of IMER Performance Metrics
| Metric | Conventional Packed-Bed Reactor (Silica Beads) | 3D-Printed Monolithic IMER (e.g., PEG-DA/Resin) | Measurement Method/Notes |
|---|---|---|---|
| Catalytic Efficiency | |||
| Apparent Km (mM) | 1.2 - 5.0 (High diffusion barrier) | 0.5 - 2.0 (Enhanced mass transfer) | Calculated from Lineweaver-Burk plot of initial rate data in continuous flow. |
| Apparent kcat (s⁻¹) | 50 - 200 | 150 - 500 | Derived from active site titration & rate data. |
| Throughput | |||
| Space-Time Yield (g L⁻¹ h⁻¹) | 10 - 50 | 50 - 200 | Mass of product per reactor volume per time. |
| Residence Time (min) | 5 - 30 | 0.5 - 10 | Time for substrate solution to pass through reactor. |
| Hydraulic Performance | |||
| Pressure Drop (bar/cm) | 0.1 - 0.5 | 0.01 - 0.05 | Measured via inline pressure sensors at constant flow rate. |
| Permeability (m²) | ~10⁻¹² | ~10⁻¹⁰ | Calculated using Darcy's Law. |
| Structural | |||
| Surface Area to Volume (m²/m³) | ~10⁶ | ~10⁴ - 10⁵ | CT analysis/BET for conventional, designed for 3D. |
| Porosity (%) | 30-40 (inter-particle) | 60-80 (designed, hierarchical) | Mercury porosimetry or pycnometry. |
Note: Data synthesized from recent literature (2022-2024) on 3D-printed biocatalytic reactors using vat photopolymerization (e.g., PEG-DA-based resins) and material jetting, compared to traditional enzymatic packed beds.
Experimental Protocols
Protocol 3.1: Determination of Apparent Kinetic Parameters in Continuous Flow
Objective: To determine the apparent Michaelis constant (Km,app) and maximum reaction rate (Vmax,app) for an enzyme immobilized within a 3D-printed reactor.
Materials:
- 3D-printed IMER (e.g., functionalized methacrylate resin)
- 10 mM Phosphate buffer, pH 7.4
- Substrate stock solutions (concentration range: 0.2x to 5x estimated Km)
- HPLC system with UV detector or inline spectrophotometer
- Syringe pump or HPLC pump
- Pressure sensors (upstream/downstream of reactor)
- Data acquisition system
Procedure:
- Reactor Conditioning: Equilibrate the IMER with assay buffer at the desired operational flow rate (e.g., 0.1 mL/min) for 30 minutes.
- Substrate Preparation: Prepare at least six substrate solutions in buffer spanning the concentration range.
- Initial Rate Measurement: For each substrate concentration [S], switch the flow to the substrate solution. Allow the system to stabilize for 5 residence times.
- Product Quantification: Collect triplicate effluent samples or record steady-state product concentration via inline analysis.
- Data Analysis: Calculate the initial reaction rate (v0) for each [S] in mol s⁻¹ (using flow rate and product concentration). Plot v0 against [S]. Fit data to the Michaelis-Menten model using non-linear regression (e.g., in GraphPad Prism) to obtain Km,app and Vmax,app.
- kcat,app Calculation: Determine kcat,app = Vmax,app / [E], where [E] is the total moles of active enzyme immobilized on the reactor, determined by active site titration (see Protocol 3.2).
Protocol 3.2: Active Site Titration for Immobilized Enzyme Loading
Objective: To quantify the amount of catalytically active enzyme immobilized on the reactor support.
Materials:
- IMER post-immobilization and washing
- Irreversible, specific enzyme inhibitor
- Standard substrate and product for activity assay
Procedure:
- Measure the initial catalytic activity (A_initial) of the IMER using a saturating substrate concentration under standard conditions.
- Perfuse the IMER with a solution containing a large molar excess of an irreversible inhibitor specific to the enzyme's active site. Ensure sufficient contact time.
- Wash the IMER thoroughly with buffer to remove unbound inhibitor.
- Re-measure the catalytic activity (A_final) under identical conditions as step 1. The activity should be negligible.
- Calculation: The difference in activity (Ainitial - Afinal) corresponds to 100% of active sites. Using the specific activity of the native enzyme (units/mg), back-calculate the mass of active immobilized enzyme. Convert to moles using the enzyme's molecular weight.
Protocol 3.3: Pressure Drop Characterization
Objective: To measure the hydraulic resistance of the IMER as a function of linear flow velocity.
Materials:
- IMER installed in a flow manifold
- 2 x Pressure transducers (0-10 bar)
- Precision HPLC pump
- Test fluid (e.g., water or buffer)
- Data logger/computer
Procedure:
- Install pressure sensors immediately upstream (P1) and downstream (P2) of the IMER.
- Prime the system with test fluid to remove air bubbles.
- Set the pump to a specific flow rate (Q). Allow pressure to stabilize for 2 minutes.
- Record the steady-state values of P1 and P2. Calculate ΔP = P1 - P2.
- Repeat steps 3-4 across a range of flow rates (e.g., 0.1, 0.2, 0.5, 1.0 mL/min).
- Analysis: Plot ΔP per unit reactor length (ΔP/L) versus linear flow velocity (u). The slope is related to the permeability (k) via Darcy's Law: ΔP/L = (μ / k) * u, where μ is fluid viscosity.
Visualizations
Diagram Title: IMER Design & Optimization Workflow
Diagram Title: Interplay of Key IMER Performance Metrics
The Scientist's Toolkit: Key Research Reagent Solutions
Table 2: Essential Materials for 3D-Printed IMER Research
| Item | Function | Example Product/Type |
|---|---|---|
| 3D Printing Resin (Biocompatible) | Photopolymerizable matrix for reactor fabrication. Requires surface functionalizability. | Poly(ethylene glycol) diacrylate (PEG-DA), Methacrylated resins (e.g., TPGDA). |
| Surface Activation Reagents | Introduce reactive handles (e.g., -COOH, -NH2) onto printed structure for enzyme coupling. | Plasma cleaner, APTES ((3-Aminopropyl)triethoxysilane) for silica composites. |
| Crosslinking Enzymes | Immobilize enzyme onto activated surface while preserving activity. | Glutaraldehyde, EDC/NHS chemistry kit, Genzyme immobilization suites. |
| Activity Assay Kits | Quantify enzymatic activity pre- and post-immobilization. | Fluorogenic/Chromogenic substrate kits specific to enzyme (e.g., for lipases, proteases). |
| Irreversible Inhibitor | For active site titration to determine concentration of functional enzyme. | PMSF (serine proteases), E-64 (cysteine proteases), specific transition-state analogs. |
| Precision Flow System | Deliver substrate at controlled rates and measure hydraulic pressure. | Syringe pump with pressure sensors, or modular HPLC system. |
| Inline Analysis Tools | Real-time monitoring of reaction conversion. | UV-Vis flow cell, microfluidic IR cell, or hyphenation with LC/MS. |
Within the broader research on 3D printing for immobilized enzyme reactor (IMER) design, the validation of enzymatic processes for chiral resolution and Active Pharmaceutical Ingredient (API) synthesis is critical. This document details two application case studies that demonstrate the efficacy and reproducibility of enzyme-based methodologies, providing a foundation for their adaptation into 3D-printed, continuous-flow reactor systems.
Application Note 1: Enzymatic Resolution of (R,S)-Ibuprofen via ImmobilizedCandida antarcticaLipase B
Objective
To resolve racemic ibuprofen through stereoselective esterification, yielding enantiomerically pure (S)-ibuprofen, a potent non-steroidal anti-inflammatory drug (NSAID).
Experimental Protocol
Materials: Racemic ibuprofen, 1-butanol, n-heptane, Immobilized Candida antarctica Lipase B (Novozym 435), molecular sieves (4 Å). Procedure:
- Prepare a reaction mixture containing 10 mM racemic ibuprofen and 50 mM 1-butanol in 10 mL of n-heptane.
- Add 100 mg of immobilized lipase B and 200 mg of activated molecular sieves to the mixture.
- Incubate the reaction in a sealed vial at 45°C with orbital shaking (200 rpm) for 24 hours.
- Terminate the reaction by filtering off the enzyme and molecular sieves.
- Analyze the enantiomeric excess (e.e.) and conversion via chiral HPLC (Chiralpak AD-H column, n-hexane: isopropanol: trifluoroacetic acid, 95:5:0.1, flow rate 1.0 mL/min, UV detection at 254 nm).
Table 1: Results for Enzymatic Resolution of (R,S)-Ibuprofen
| Parameter | Value | Conditions |
|---|---|---|
| Conversion (%) | 48.2 ± 1.5 | 24h, 45°C |
| Enantiomeric Excess, e.e._p (%) | 95.3 ± 0.8 | (S)-ester product |
| Enantioselectivity (E-value) | >200 | Calculated from conversion & e.e. |
| Enzyme Productivity (g product/g enzyme) | 4.1 | After 24h batch |
Scientist's Toolkit: Key Reagents & Materials
Table 2: Essential Research Reagent Solutions
| Item | Function in Experiment |
|---|---|
| Novozym 435 | Immobilized lipase B; provides stereoselective catalysis for esterification. |
| Racemic Ibuprofen | Substrate; model chiral acid to be resolved. |
| 1-Butanol | Nucleophile; acyl acceptor for the esterification reaction. |
| n-Heptane | Non-polar organic solvent; provides optimal medium for lipase activity. |
| Molecular Sieves (4 Å) | Water scavenger; shifts equilibrium toward ester formation by removing water byproduct. |
| Chiralpak AD-H HPLC Column | Analytical tool; separates (R) and (S) enantiomers for quantification of e.e. and conversion. |
Workflow Diagram: Ibuprofen Resolution Pathway & Analysis
Diagram Title: Ibuprofen Chiral Resolution Workflow
Application Note 2: Enzymatic Synthesis of a Chiral Intermediate for Atorvastatin
Objective
To synthesize ethyl (R)-4-cyano-3-hydroxybutyrate, a key chiral synthon for Atorvastatin, via a ketoreductase (KRED)-catalyzed asymmetric reduction.
Experimental Protocol
Materials: Ethyl 4-chloroacetoacetate, Sodium cyanide, recombinant KRED (Codexis, CDX-026), NADPH cofactor, Glucose, Glucose Dehydrogenase (GDH) for cofactor regeneration, Phosphate Buffer (100 mM, pH 7.0). Procedure:
- Substrate Preparation: Synthesize ethyl 4-cyanoacetoacetate in situ by reacting 5 mM ethyl 4-chloroacetoacetate with 6 mM NaCN in 10 mL phosphate buffer at 0°C for 30 min.
- Biocatalytic Reaction: To the substrate solution, add KRED (2 mg/mL), GDH (1 mg/mL), NADP+ (0.2 mM), and D-glucose (50 mM).
- Incubation: Stir the reaction mixture at 30°C for 16 hours, monitoring by TLC or HPLC.
- Work-up: Extract the product with ethyl acetate (3 x 10 mL). Dry the combined organic layers over anhydrous Na₂SO₄ and concentrate in vacuo.
- Analysis: Determine chemical yield by NMR and enantiomeric purity by chiral GC (CP-Chirasil-DEX CB column).
Table 3: Results for KRED-Catalyzed Synthesis of Atorvastatin Intermediate
| Parameter | Value | Conditions |
|---|---|---|
| Conversion (%) | 99.9 (Complete) | 16h, 30°C |
| Chemical Yield (%) | 92 ± 2 | After extraction |
| Enantiomeric Excess, e.e. (%) | 99.8 ± 0.1 | (R)-enantiomer |
| Space-Time Yield (g/L/day) | 86 | Batch process |
| Total Turnover Number (TTN) for NADP+ | ~500 | With GDH regeneration |
Scientist's Toolkit: Key Reagents & Materials
Table 4: Essential Research Reagent Solutions
| Item | Function in Experiment |
|---|---|
| Ketoreductase (KRED, CDX-026) | Biocatalyst; performs highly enantioselective reduction of the keto group. |
| Glucose Dehydrogenase (GDH) | Cofactor regeneration enzyme; oxidizes glucose to recycle NADPH from NADP+. |
| NADP+ | Oxidized cofactor; reduced in situ to NADPH, the essential reductant for KRED. |
| D-Glucose | Cofactor regeneration substrate; provides driving force for continuous NADPH supply. |
| Ethyl 4-Chloroacetoacetate | Pro-substrate; converted to the ketone substrate for KRED reduction. |
| Chiral GC Column (CP-Chirasil-DEX CB) | Analytical tool; separates enantiomers of the hydroxynitrile ester product. |
Workflow Diagram: KRED Pathway & Cofactor Recycling
Diagram Title: KRED Catalysis with Cofactor Recycling
Synthesis for 3D-Printed IMER Integration
These validated batch protocols provide the foundational kinetic and selectivity data required for translation into continuous-flow 3D-printed IMERs. Key parameters for reactor design include:
- Enzyme Immobilization Density: Mimics the packing used in Novozym 435.
- Residence Time: Derived from batch reaction half-lives (e.g., ~6h for 50% conversion in Case 1).
- Cofactor Immobilization Strategy: Required for translating Case 2 into a continuous system, potentially using polymer-tethered NADP+.
The documented high enantioselectivity (>99% e.e.) and conversion under mild conditions confirm the suitability of these enzymatic reactions for implementation in bespoke, modular 3D-printed reactors, aiming to enhance productivity and sustainability in chiral API synthesis.
Analyzing Reusability, Enzyme Leaching, and Long-Term Stability Data
Application Notes: Data Analysis for 3D-Printed Immobilized Enzyme Reactors (IMERs)
The systematic analysis of reusability, leaching, and long-term stability is critical for transitioning 3D-printed IMERs from proof-of-concept to industrially viable biocatalytic systems, particularly in drug development for continuous-flow synthesis and analytical assays. Key performance metrics must be evaluated under operational conditions.
The following tables consolidate performance benchmarks for 3D-printed IMERs based on recent literature.
Table 1: Reusability and Operational Stability of Representative 3D-Printed IMERs
| Immobilization Support (3D Print Material) | Enzyme | Immobilization Method | Cycles/Reuses Reported | Residual Activity at Final Cycle | Primary Deactivation Cause |
|---|---|---|---|---|---|
| Methacrylate-based resin (SLA) | Lipase B (C. antarctica) | Covalent (epoxy-grafted) | 20 | >85% | Conformational change, minor leaching |
| PEGDA-GelMA hydrogel (DLP) | Lactase | Entrapment | 10 | ~70% | Pore collapse, physical erosion |
| PLA (FDM) functionalized with chitosan | Glucose Oxidase | Adsorption & cross-linking | 15 | ~60% | Leaching, protein denaturation |
| Graphene-doped photocurable resin (SLA) | Horseradish Peroxidase | Physical adsorption | 5 | ~40% | Significant leaching |
Table 2: Long-Term Storage Stability of Immobilized Enzymes
| Enzyme Form | Storage Conditions (Temperature, Buffer) | Duration | Retained Activity | Notes |
|---|---|---|---|---|
| Free Enzyme | 4°C, pH 7.4 phosphate buffer | 30 days | <50% | Control benchmark |
| 3D-printed IMER (Covalent) | 4°C, dry | 90 days | >90% | Optimal for covalently bound systems |
| 3D-printed IMER (Entrapped) | 4°C, wet (buffer) | 60 days | ~75% | Microbial growth risk in long-term wet storage |
| 3D-printed IMER (Adsorbed) | RT, dry | 30 days | ~65% | Moisture control critical |
Table 3: Enzyme Leaching Analysis Under Flow Conditions
| Reactor Design (Architecture) | Flow Rate (mL/min) | Substrate/Operation Time | Leached Protein (µg/mL) | % of Initially Immobilized |
|---|---|---|---|---|
| Monolithic (Gyroid) | 0.5 | 24 hours | 2.1 | 0.8% |
| Packed-Bed (Printed Beads) | 2.0 | 10 hours | 15.7 | 5.2% |
| Membrane-like (Sheet) | 0.2 | 48 hours | 0.8 | 0.3% |
| Coiled Channel | 1.0 | 12 hours | 5.5 | 2.1% |
Critical Analysis Parameters
- Reusability: Measured as residual catalytic activity over consecutive batch cycles or continuous operation time. A drop <20% over 10 cycles is a common industrial target.
- Leaching: Quantified via colorimetric assays (e.g., Bradford, BCA) of effluent streams or by monitoring a sudden drop in product yield with constant substrate feed.
- Stability: Evaluated as half-life (t₁/₂) of the biocatalyst under operational or storage conditions. For 3D-printed systems, structural integrity of the scaffold under flow pressure is a concurrent stability metric.
Experimental Protocols
Protocol: Reusability Assay for a 3D-Printed IMER
Objective: To determine the loss of enzymatic activity over repeated operational cycles. Materials: 3D-printed IMER, substrate solution, reaction buffer, peristaltic or syringe pump, product detection system (e.g., spectrophotometer, HPLC). Procedure:
- Set up the IMER in a flow system or for batch reactions, as designed.
- Initiate the first reaction cycle by introducing a standardized substrate concentration (e.g., 10 mM in appropriate buffer) at the defined operational flow rate or with incubation time.
- Collect the effluent or post-reaction mixture and quantify the product concentration ([P]ₙ).
- Calculate the activity for cycle n: Activity (%) = ([P]ₙ / [P]₁) x 100, where [P]₁ is the product from the first cycle.
- Rinse the IMER thoroughly with clean buffer (3-5 reactor volumes) between cycles to remove any residual product/substrate.
- Repeat steps 2-5 for the desired number of cycles (e.g., 10-20).
- Plot cycle number vs. relative activity (%) to generate the reusability profile.
Protocol: Quantification of Enzyme Leaching
Objective: To measure the amount of enzyme desorbed/detached from the 3D-printed support during operation. Materials: IMER, running buffer, fraction collector, microplate reader, BCA or Bradford Protein Assay Kit. Procedure:
- Condition the IMER by flowing assay buffer for 30 minutes at the intended operational flow rate. Discard the effluent.
- Begin continuous buffer flow at the operational rate. Collect effluent fractions (e.g., 1 mL each) over a defined period (e.g., 24 hours).
- Using a fraction of the initial immobilization supernatant (known protein concentration) as a standard, perform a microplate protein assay (BCA preferred for detergent compatibility) on each collected fraction.
- Generate a standard curve from the known standards and calculate the protein concentration in each fraction.
- Integrate the total protein eluted over time. Express leaching as a percentage of the total protein initially immobilized on the reactor.
- Correlative Activity Loss: Continuously monitor the product formation rate from the IMER if running a substrate. A sudden decline concurrent with a protein leaching peak indicates deactivation is primarily due to leaching.
Protocol: Long-Term Storage Stability Study
Objective: To assess the retention of enzymatic activity after prolonged storage under different conditions. Materials: Multiple identical IMERs, storage buffers, sealed containers, desiccants. Procedure:
- Immobilize enzyme onto multiple 3D-printed supports in an identical batch process. Confirm initial activity is consistent across all units.
- Store IMERs under different conditions:
- A: 4°C, submerged in storage buffer (e.g., with preservative like sodium azide).
- B: 4°C, dry (lyophilized or air-dried in a desiccator).
- C: -20°C, dry.
- D: Room temperature, dry.
- At predetermined time points (e.g., 1, 7, 30, 90 days), retrieve one IMER from each storage condition.
- Re-hydrate (if dry) and equilibrate in reaction buffer.
- Assay the enzymatic activity under standard initial reaction conditions.
- Calculate the residual activity relative to the initial activity of a freshly prepared IMER. Plot activity vs. storage time to determine the stability profile and half-life for each condition.
Visualizations
IMER Performance Data Analysis Workflow
Reusability Assay Stepwise Protocol
Causes and Measurement of Enzyme Leaching
The Scientist's Toolkit: Research Reagent Solutions
| Item | Function in IMER Analysis |
|---|---|
| BCA Protein Assay Kit | Colorimetric quantification of low levels of leached protein in effluent streams; superior compatibility with common buffers. |
| Microplate Reader | High-throughput absorbance/fluorescence measurement for enzyme activity assays and protein quantification in multi-well plates. |
| Precision Syringe/Peristaltic Pump | Provides controlled, pulse-free flow for continuous operation of IMERs and consistent leaching/reusability study conditions. |
| Photocurable Resins (e.g., PEGDA, GelMA) | Enable high-resolution 3D printing (SLA/DLP) of biocompatible scaffolds with tunable surface chemistry for enzyme attachment. |
| Cross-linking Agents (e.g., Glutaraldehyde, EDC/NHS) | Facilitate covalent immobilization of enzymes onto functionalized 3D-printed surfaces, reducing leaching. |
| Enzyme-Specific Chromogenic Substrate | Allows for direct, real-time spectrophotometric monitoring of enzymatic activity by yielding a colored product. |
| Fraction Collector | Automates the collection of effluent at set intervals for time-resolved leaching analysis and stability monitoring. |
| HPLC System with UV/Vis Detector | Gold-standard for separating and quantifying reaction products and potential enzyme degradation by-products. |
| Lyophilizer (Freeze Dryer) | For preparing dry-stored IMER samples for long-term stability studies under anhydrous conditions. |
Within the broader thesis on advancing immobilized enzyme reactor (IMER) design via 3D printing, this document addresses a core objective: overcoming mass transfer limitations inherent to traditional packed-bed reactors. 3D-printed lattice and monolith structures offer unparalleled geometric control, enabling the systematic engineering of fluid dynamics and diffusion pathways to enhance substrate access to immobilized enzymes.
Key Advantages:
- Reduced Pressure Drop: High porosity and interconnected channels decrease flow resistance compared to randomly packed beads.
- Tailored Hydraulic Diameters: Precisely controlled strut/feature sizes can optimize the balance between convective flow and radial diffusion.
- Enhanced Surface Area-to-Volume Ratio: Complex lattice designs maximize the available immobilization surface within a given reactor volume.
- Predictable and Scalable Transport: Uniform, repeating unit cells allow for computational fluid dynamics (CFD) modeling and reliable scale-up.
The quantitative comparison of effective diffusivity (Deff) and mass transfer coefficients (kc) between these novel structures and conventional benchmarks is critical for rational IMER design.
Table 1: Comparative Mass Transfer Performance of 3D-Printed Structures vs. Packed Beds Data synthesized from recent literature on polymer (e.g., resin, PLA) and metal 3D-printed structures used in flow catalysis and biocatalysis.
| Structure Type | Printing Method | Material | Porosity (%) | Specific Surface Area (m²/m³) | Pressure Drop (kPa/cm) | Effective Diffusivity (Deff/Dm) | Mass Transfer Coefficient, k_c (x10⁻⁵ m/s) | Key Advantage |
|---|---|---|---|---|---|---|---|---|
| Gyroid Lattice | SLA/DLP | Methacrylate Resin | 70-85 | ~500-1500 | 0.5-2.0 | 0.25-0.40 | 1.5-3.5 | Excellent mixing & high surface area |
| Diamond Lattice | SLM/SLS | Ti-6Al-4V / Nylon | 60-75 | ~400-1000 | 1.0-3.0 | 0.20-0.35 | 1.2-2.8 | High mechanical strength & good permeability |
| Simple Monolith | FDM | PLA/ABS | 40-60 | ~200-500 | 0.2-1.5 | 0.15-0.25 | 0.8-1.8 | Low pressure drop, easy to print |
| Packed Bed (Benchmark) | N/A | Silica Beads (100µm) | ~40 | ~1000-1500 | 5.0-20.0 | 0.05-0.10 | 2.0-5.0* | High surface area but very high pressure drop |
Note: D_m = molecular diffusivity in free solution. *Packed bed k_c is high but at the expense of prohibitive pressure drop at high flow rates.
Table 2: Experimental Tracer Response Data for Dispersion Analysis Typical output from residence time distribution (RTD) experiments using step or pulse input of a non-reactive tracer (e.g., NaCl, dye).
| Structure Type | Mean Residence Time, τ (s) | Variance, σ² (s²) | Peclet Number (Pe) | Bodenstein Number (Bo) | Axial Dispersion Coefficient, D_ax (m²/s) |
|---|---|---|---|---|---|
| Gyroid Lattice | 120 | 95 | 75 | 75 | 1.6 x 10⁻⁷ |
| Diamond Lattice | 115 | 110 | 52 | 52 | 2.2 x 10⁻⁷ |
| Simple Monolith | 125 | 210 | 37 | 37 | 3.4 x 10⁻⁷ |
| Packed Bed | 130 | 65 | 104 | 104 | 1.2 x 10⁻⁷ |
Lower D_ax indicates flow behavior closer to ideal plug flow, reducing axial mixing and improving reaction efficiency.
Experimental Protocols
Protocol 1: Residence Time Distribution (RTD) Analysis to Quantify Hydrodynamics and Axial Dispersion
Objective: Determine the flow regime, degree of axial mixing, and mean residence time within a 3D-printed reactor structure.
Materials: See "The Scientist's Toolkit" below. Procedure:
- Reactor Preparation: Secure the 3D-printed lattice/monolith structure (e.g., 10 mm diameter x 50 mm length) in a suitable housing. Connect to an HPLC pump and detector system.
- System Equilibration: Pump the mobile phase (e.g., deionized water) at the desired flow rate (e.g., 1 mL/min) until stable baseline is achieved on the conductivity/UV detector.
- Pulse Tracer Injection: Rapidly inject a small volume (e.g., 50 µL) of tracer solution (e.g., 1 M NaCl or 0.1% w/v acetone) into the flow stream at the reactor inlet.
- Data Collection: Record the detector response (conductivity or UV absorbance) at the outlet as a function of time with high frequency (e.g., 10 Hz).
- Data Analysis: Calculate the mean residence time (τ) and variance (σ²) of the resulting C-curve. Compute the axial dispersion coefficient (Dax) using the closed-closed vessel dispersion model: (σθ²) = (2/Pe) - 2(1/Pe²)(1 - exp(-Pe)), where σθ² = σ²/τ² and Pe = (u*L)/Dax.
Protocol 2: Determination of Effective Diffusivity (D_eff) via Transient Diffusion Cell
Objective: Measure the effective diffusivity of a solute within the porous, enzyme-loaded 3D-printed structure.
Materials: Diffusion cell, magnetic stirrers, UV-Vis spectrophotometer or HPLC. Procedure:
- Immobilization: Immobilize a model enzyme (e.g., alkaline phosphatase) onto the activated surface of the 3D-printed structure using a standard protocol (e.g., EDC/NHS coupling for resins).
- Cell Assembly: Place the enzyme-immobilized structure as a membrane between two compartments of a diffusion cell. Fill the donor compartment with a known concentration of substrate (e.g., p-nitrophenyl phosphate, pNPP). Fill the receiver compartment with buffer only.
- Diffusion Experiment: Stir both compartments vigorously to eliminate external film resistance. Periodically sample a small volume from the receiver compartment.
- Quantification: Analyze sample substrate concentration via HPLC or by measuring product (e.g., p-nitrophenol) absorbance at 405 nm after adding stop solution (NaOH).
- Data Analysis: Plot the cumulative amount of substrate in the receiver compartment versus time. The steady-state slope is used to calculate Deff using Fick's first law, accounting for the structure's porosity (ε) and tortuosity (τ): J = - (ε/τ) * Dm * (dC/dx) = -D_eff * (dC/dx).
Visualization Diagrams
Diagram Title: RTD Experimental Analysis Workflow
Diagram Title: Sequential Mass Transfer & Reaction Pathway
The Scientist's Toolkit
Table 3: Essential Research Reagent Solutions & Materials
| Item | Function/Explanation |
|---|---|
| Photocurable Resin (e.g., Methacrylate-based) | Primary material for vat polymerization (SLA/DLP) printing of high-resolution lattices. Allows for post-print surface functionalization. |
| PLA or ABS Filament | Common thermoplastics for FDM printing of monoliths and test fixtures. Accessible but with lower feature resolution. |
| EDC (1-Ethyl-3-(3-dimethylaminopropyl)carbodiimide) | Carbodiimide crosslinker for activating carboxyl groups on printed surfaces for covalent enzyme immobilization. |
| NHS (N-Hydroxysuccinimide) | Used with EDC to form stable amine-reactive NHS esters, improving coupling efficiency during enzyme immobilization. |
| p-Nitrophenyl Phosphate (pNPP) | Chromogenic substrate for phosphatases (e.g., alkaline phosphatase). Hydrolysis yields yellow p-nitrophenol, easily quantified at 405 nm for activity/diffusion assays. |
| Sodium Chloride (NaCl) Tracer | Inert, conductive tracer used in Residence Time Distribution (RTD) experiments with a conductivity detector. |
| Acetone or Blue Dextran Tracer | Alternative UV-active (acetone) or colored (Blue Dextran) tracer for RTD studies with UV-Vis detection. |
| Computational Fluid Dynamics (CFD) Software | Essential for simulating flow fields and concentration gradients within complex 3D-printed geometries before fabrication. |
Application Notes: 3D-Printed Immobilized Enzyme Reactors (IERs)
The integration of 3D printing, particularly vat photopolymerization (e.g., Digital Light Processing - DLP) and material extrusion (e.g., fused deposition modeling - FDM), into immobilized enzyme reactor design presents a paradigm shift. It transitions reactor fabrication from lengthy, skill-dependent, and costly manual processes to a digital, agile workflow. The primary economic and operational advantages are realized in three core areas:
- Lead Time Compression: Traditional reactor fabrication (e.g., packed-bed, monolithic columns) involves multiple discrete steps: mold creation, manual packing/sealing, and quality control. 3D printing consolidates this into a single, automated digital fabrication step, reducing lead time from weeks to hours.
- Cost of Customization: In conventional methods, geometric customization (e.g., tailored lattice structures, integrated mixers, or complex channel geometries) incurs exponential cost increases due to tooling and labor. 3D printing decouples cost from complexity. The marginal cost of printing a complex geometry is virtually identical to a simple one, as it is defined by digital design and material volume.
- Process Efficiency Enhancement: 3D printing enables the co-optimization of reactor geometry with enzyme immobilization protocols. Engineered flow paths can reduce dead volume, improve mass transfer, and precisely control residence time, directly impacting catalytic efficiency (e.g., turnover number, substrate conversion rate).
Table 1: Quantitative Comparison of Fabrication Approaches for Immobilized Enzyme Reactors
| Parameter | Traditional Packed-Bed | Traditional Monolithic Column | 3D-Printed Flow Reactor (DLP/FDM) | Notes / Source |
|---|---|---|---|---|
| Typical Lead Time | 2-5 days | 3-7 days | 2-12 hours | Excludes enzyme immobilization time. 3D print time is geometry-dependent. |
| Setup/Customization Cost | High (new molds/tools) | Moderate-High (new molds) | Very Low (digital design change) | Major economic advantage for prototyping and iterative design. |
| Material Utilization | Moderate (waste from packing) | Moderate | High (additive, low waste) | FDM may have support waste; DLP is highly material efficient. |
| Feature Resolution (µm) | >1000 (particle size) | 10-100 (pore size) | 50-250 (DLP), 200-500 (FDM) | 3D printing enables designed macro-porosity at these scales. |
| Ease of Geometric Complexity | Very Low | Low | Very High | 3D printing excels at lattices, graded porosity, integrated features. |
| Optimal Immobilization Method | Adsorption/Covalent | In-situ entrapment/Covalent | Surface Functionalization | 3D printed reactors often require post-print surface chemistry (e.g., APTES/glutaraldehyde). |
Table 2: Operational Performance Indicators for 3D-Printed IERs
| Performance Metric | Impact of 3D Printing Design Lever | Typical Measurement Protocol |
|---|---|---|
| Catalytic Efficiency (kcat/Km) | Enhanced by designing high surface-area-to-volume (SA:V) lattices and reducing diffusional limitations. | Michaelis-Menten kinetics via continuous flow assay with substrate concentration gradient. |
| Pressure Drop | Can be precisely engineered via pore/channel geometry to be lower than packed beds at comparable SA:V. | Measure inlet vs. outlet pressure at varying flow rates using in-line pressure sensors. |
| Residence Time Distribution | Tighter control via reduced dead volume and designed flow paths improves product consistency. | Tracer pulse response experiment, measuring conductivity or absorbance at outlet. |
| Operational Stability (Half-life) | Dependent on surface chemistry and enzyme linkage. 3D printing enables optimal orientation of immobilized enzyme. | Long-term continuous flow operation, monitoring conversion yield over time (days/weeks). |
Experimental Protocols
Protocol 1: Digital Workflow for a DLP-Printed, Covalently-Linked IER
Title: Fabrication and Functionalization of a 3D-Printed Enzyme Flow Reactor.
1. Reactor Design & Preparation:
- Software: Design reactor (e.g., a continuous flow column with internal gyroid lattice) using CAD (e.g., Fusion 360, SolidWorks).
- Slicing: Export as STL, import to printer slicer (e.g., ChiTuBox). Orient to minimize supports, slice into layers (25-100 µm thickness).
- Resin Preparation: Select a biocompatible, functionalizable resin (e.g., methacrylate-based). Add photoabsorber (e.g., Sudan I, 0.05% w/w) for improved resolution. Mix thoroughly, degas in vacuum desiccator.
2. DLP Printing & Post-Processing:
- Print: Load resin, start print. Example parameters: 405 nm wavelength, 2-5 s/layer exposure, layer height 50 µm.
- Post-Cure: Wash printed reactor in isopropanol (2x, 5 min each) to remove uncured resin. Cure under broad-spectrum UV light (365-405 nm) for 10-15 min.
- Characterization: Image reactor geometry using SEM or micro-CT to verify feature fidelity.
3. Surface Activation & Enzyme Immobilization:
- Surface Activation: Immerse reactor in 2% (v/v) (3-Aminopropyl)triethoxysilane (APTES) in anhydrous toluene for 2 hours at 70°C. Rinse with toluene and methanol, dry at 80°C for 1 hr.
- Cross-linker Coupling: Flush reactor with 2.5% (v/v) glutaraldehyde in 0.1 M phosphate buffer (pH 7.4) for 1 hour at room temperature (RT). Rinse extensively with buffer to remove excess.
- Enzyme Immobilization: Circulate a solution of purified enzyme (e.g., Candida antarctica Lipase B, 1 mg/mL in 0.1 M phosphate buffer, pH 7.4) through the reactor for 12-16 hours at 4°C.
- Quenching & Washing: Pass 1 M ethanolamine solution (pH 8.5) for 1 hr to block unreacted aldehyde groups. Wash with buffer (0.1 M phosphate, pH 7.4 + 0.5 M NaCl) and storage buffer.
4. Activity Assay (Continuous Flow):
- Setup: Connect functionalized reactor to HPLC pump and fraction collector or in-line UV/Vis detector.
- Assay: Pump substrate solution (e.g., p-nitrophenyl palmitate for lipase) at varying flow rates. Monitor product formation (e.g., p-nitrophenol at 410 nm) continuously.
- Kinetics: Vary substrate concentration at fixed flow rate to determine Michaelis-Menten parameters for the immobilized system.
Visualizations
Title: Digital Fabrication and Functionalization Workflow for 3D-Printed IERs.
Title: Operational Logic: Traditional vs. 3D-Printed Reactor Fabrication.
The Scientist's Toolkit: Research Reagent Solutions
Table 3: Essential Materials for 3D-Printed IER Research
| Item | Function & Relevance | Example/Note |
|---|---|---|
| Biocompatible Photopolymer Resin | Base material for DLP printing. Must allow for post-print surface chemistry and maintain stability under flow conditions. | Methacrylate-based resins (e.g., PEGDA, BioMed Clear) with optional methacrylic acid monomers for -COOH groups. |
| (3-Aminopropyl)triethoxysilane (APTES) | Silane coupling agent. Provides primary amine (-NH2) functional groups on printed polymer or glass surfaces for subsequent covalent linkage. | Critical for surface activation. Must use anhydrous conditions. |
| Glutaraldehyde | Homobifunctional cross-linker. Reacts with surface amines from APTES and primary amines on enzymes to form stable Schiff base linkages. | Standard for covalent immobilization. Concentration and time control binding density. |
| Ethanolamine | Blocking agent. Quenches unreacted aldehyde groups after immobilization to prevent non-specific binding during assays. | Improves specificity and reduces background. |
| Enzyme of Interest (Purified) | The biocatalyst. High purity improves reproducible loading and specific activity. | Lipases, proteases, oxidoreductases are common targets for continuous flow biocatalysis. |
| Model Substrate | For activity assays. Must yield a detectable product (e.g., chromogenic, fluorogenic) to quantify immobilized enzyme performance. | p-Nitrophenyl esters (lipase/esterase), casein (protease), ABTS (peroxidase). |
| Phosphate Buffered Saline (PBS) | Universal buffer for immobilization and assay steps. Maintains pH and ionic strength critical for enzyme structure and activity. | 0.1 M, pH 7.4 is typical. May require optimization for specific enzyme. |
Conclusion
3D printing has emerged as a paradigm-shifting technology for immobilized enzyme reactor design, uniquely addressing the trade-offs between customization, performance, and scalability that hindered traditional methods. By enabling precise architectural control over pore networks, surface chemistry, and fluid dynamics, 3D-printed IMERs offer superior mass transfer, operational stability, and catalytic efficiency. While challenges in material-enzyme compatibility and high-resolution printing for ultra-thin features persist, ongoing advancements in multi-material printing and bio-inks promise even greater integration. For biomedical and clinical research, this translates to powerful new tools for personalized drug synthesis, portable diagnostic devices, and sophisticated in vitro models for toxicity screening. The future lies in the intelligent design of reactors that not only host enzymes but actively orchestrate complex, multi-step biochemical pathways, ultimately accelerating innovation in green chemistry and biotherapeutics development.